Hi all,
Here is another Blog Post about managing Windows Start Menu and Taskbar in a Win10 Creators Update (Version 1703 (OS Build 15063.xxx)).
In older Windows 10 versions it was more difficult to manage them. There are many solutions out in Blogs but they are not really supported by Microsoft.
Now Microsoft saw in feedback hub that there is a really need to manage them better. Now MS is listening to you if you have any wishes for upcoming Windows 10 versions. Use this link to write your wishes or just vote for an existing one. Use this App: http://www.microsoft.com/en-us/store/p/feedback-hub/9nblggh4r32n
Register here for Insider Program: https://answers.microsoft.com/en-us/insider/forum?tab=Threads
But for now, we´d like to manage or create our Start Menu and/or Taskbar. There is one more option. If you have links from EDGE-Browser App and you´d like to pin a Website to your Client’s Start Menu you could include Tile Picture.
First of all, I´d like to say thank you to Jörgen, another EMS MVP, he had the first impression and also a final hint for me to implement the command line option for a Config Manager TS http://ccmexec.com/2015/09/customizing-the-windows-10-start-menu-and-add-ie-shortcut-during-osd/
(By the way, here is an information for those who use Win10 Pro. Now it is possible to use this content on a pro version.)
Let’s start:
- We like to configure our Start Menu on freshly installed client.
- If you like to clean the Start Menu, you can create a blanc XML easily and import it.
-
Set your Tiles and Apps to Menu and maybe group them. Give groups cool titles.
- If you like you could change your Taskbar, too.
- If you like you could only manage your Taskbar.
- If you like you could edit XML with more settings.
-
Use that XML
- Deploy it by script.
- Deploy it by GPO.
- Deploy it by Config Manager Task sequence.
- Deploy it with Intune for MDM managed Devices.
- Have fun!
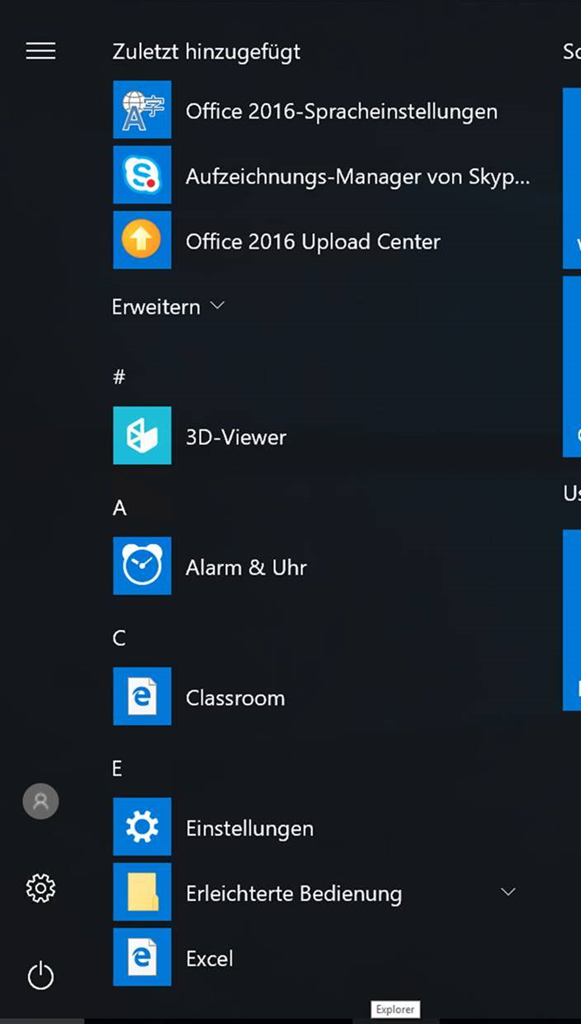
- We like to configure our Start Menu on freshly installed client
This is the classic Menu when you click Windows button.
Official Start from Microsoft: Manage Windows 10 Start and taskbar layout
I will show some important functions.

A picture says more than 1000 words.
Next step:
- If you like to clean Start Menu, you can easily create a blanc XML and import it.
Start PowerShell with extended Mode and type “get-help export-StartLayout”
PS C:\WINDOWS\system32> get-help Export-StartLayout
NAME
Export-StartLayout
SYNOPSIS
Exports the layout of the Start screen.
SYNTAX
Export-StartLayout [-Path] <String> [-InformationAction {SilentlyContinue | Stop | Continue | Inquire | Ignore |
Suspend}] [-InformationVariable <System.String>] [-Confirm] [-WhatIf] [<CommonParameters>]
Export-StartLayout [-LiteralPath] <String> [-InformationAction {SilentlyContinue | Stop | Continue | Inquire |
Ignore | Suspend}] [-InformationVariable <System.String>] [-Confirm] [-WhatIf] [<CommonParameters>]
DESCRIPTION
The Export-StartLayout cmdlet exports the layout of the tiles on Start of the current user. You can export layout
and use Import-StartLayout as well as other management policies for the Start layout. Specify the .xml file
extension in the name of the file.
RELATED LINKS
Online Version: http://go.microsoft.com/fwlink/?LinkID=294168
Import-StartLayout
REMARKS
To see the examples, type: “get-help Export-StartLayout -examples”.
For more information, type: “get-help Export-StartLayout -detailed”.
For technical information, type: “get-help Export-StartLayout -full”.
For online help, type: “get-help Export-StartLayout -online”
For this we use following command: export-StartLayout –Path C:\Test\myStartmenu.xml
In this case PoSh will create XML with your Settings in Start Menu (only). If you like to add your Taskbar Settings too you must do this manually (description step 3).
Here are XML that we just clear for any Tiles, Apps or Applications to load into Windows to start with a clean Start Menu.
- We have the exported one:
<LayoutModificationTemplate xmlns:defaultlayout=”http://schemas.microsoft.com/Start/2014/FullDefaultLayout” xmlns:start=”http://schemas.microsoft.com/Start/2014/StartLayout” Version=”1″ xmlns=”http://schemas.microsoft.com/Start/2014/LayoutModification“>
<LayoutOptions StartTileGroupCellWidth=”6″ />
<DefaultLayoutOverride>
<StartLayoutCollection>
<defaultlayout:StartLayout GroupCellWidth=”6″>
<start:Group Name=”School business”>
<start:DesktopApplicationTile Size=”2×2″ Column=”0″ Row=”0″ DesktopApplicationLinkPath=”%APPDATA%\Microsoft\Windows\Start Menu\Programs\Word.url” />
<start:DesktopApplicationTile Size=”2×2″ Column=”2″ Row=”0″ DesktopApplicationLinkPath=”%APPDATA%\Microsoft\Windows\Start Menu\Programs\Excel.url” />
<start:DesktopApplicationTile Size=”2×2″ Column=”2″ Row=”2″ DesktopApplicationLinkPath=”%ALLUSERSPROFILE%\Microsoft\Windows\Start Menu\Programs\Skype for Business 2016.lnk” />
<start:DesktopApplicationTile Size=”2×2″ Column=”4″ Row=”0″ DesktopApplicationLinkPath=”%APPDATA%\Microsoft\Windows\Start Menu\Programs\PowerPoint.url” />
<start:DesktopApplicationTile Size=”2×2″ Column=”0″ Row=”2″ DesktopApplicationLinkPath=”%APPDATA%\Microsoft\Windows\Start Menu\Programs\OneNote.url” />
<start:DesktopApplicationTile Size=”2×2″ Column=”4″ Row=”2″ DesktopApplicationLinkPath=”%APPDATA%\Microsoft\Windows\Start Menu\Programs\Classroom.url” />
</start:Group>
<start:Group Name=”Usefull”>
<start:Tile Size=”2×2″ Column=”0″ Row=”0″ AppUserModelID=”Microsoft.MicrosoftEdge_8wekyb3d8bbwe!MicrosoftEdge” />
<start:Tile Size=”2×2″ Column=”2″ Row=”0″ AppUserModelID=”Microsoft.WindowsCalculator_8wekyb3d8bbwe!App” />
</start:Group>
</defaultlayout:StartLayout>
</StartLayoutCollection>
</DefaultLayoutOverride>
</LayoutModificationTemplate>
- Delete lines you don’t need (there is a limitation, you need a placeholder but that is ok):
<LayoutModificationTemplate xmlns:defaultlayout=”http://schemas.microsoft.com/Start/2014/FullDefaultLayout” xmlns:start=”http://schemas.microsoft.com/Start/2014/StartLayout” Version=”1″ xmlns=”http://schemas.microsoft.com/Start/2014/LayoutModification“>
<LayoutOptions StartTileGroupCellWidth=”6″ />
<DefaultLayoutOverride>
<StartLayoutCollection>
<defaultlayout:StartLayout GroupCellWidth=”6″>
<start:Group Name=”School business”>
<start:Tile Size=”2×2″ Column=”0″ Row=”0″ AppUserModelID=”Microsoft.MicrosoftEdge_8wekyb3d8bbwe!MicrosoftEdge” />
</start:Group>
</defaultlayout:StartLayout>
</StartLayoutCollection>
</DefaultLayoutOverride>
</LayoutModificationTemplate>
Here I created one for you: https://github.com/slaet/Win10_1703_Start_taskbar/blob/master/EmptyStartmenu.xml
Import this command to Start Menu. Then you need to reboot the device. Now “new” created Start Menu can be loaded from system (don’t forget to log in with a different User. In this case Start Menu will only create once if a “fresh(new)” User logs in first time):
Import-StartLayout –LayoutPath C:\Test\emptyStartmenu.xml -MountPath $env:SystemDrive\
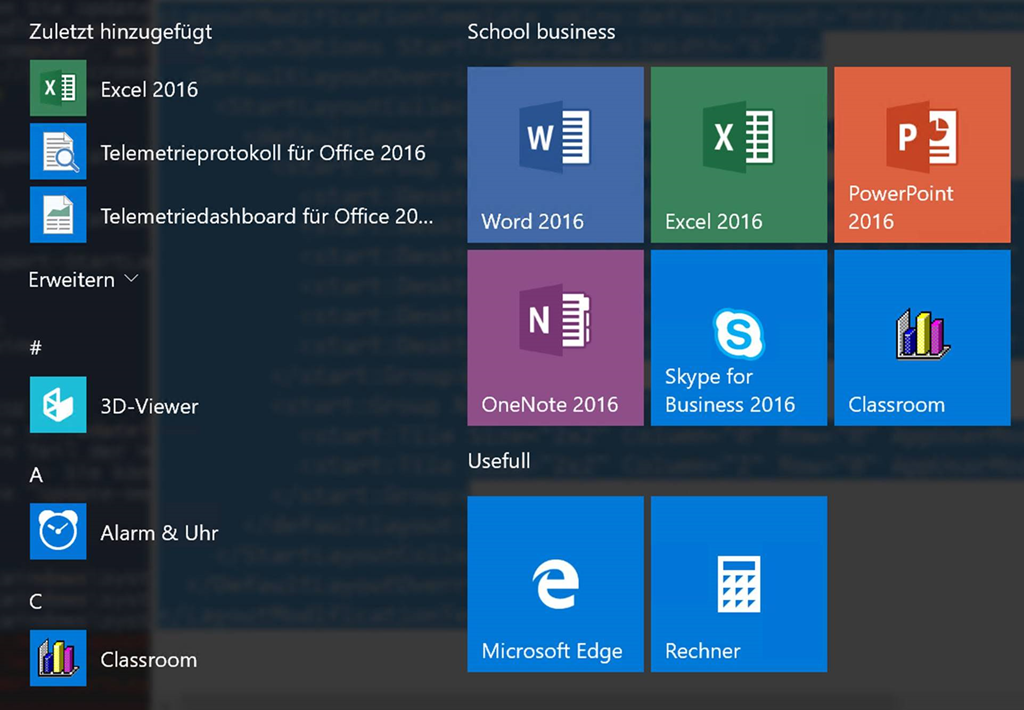
- Set your Tiles and Apps to Menu and maybe group them and give groups cool titles.
Here I created my own Start Menu. I added some Tile (They call it secondary Tiles. The App you use is the Tile and if you open something in an App is secondary. It is like a link that opens EDGE Browser App)
<LayoutModificationTemplate xmlns:defaultlayout=”http://schemas.microsoft.com/Start/2014/FullDefaultLayout” xmlns:start=”http://schemas.microsoft.com/Start/2014/StartLayout” Version=”1″ xmlns=”http://schemas.microsoft.com/Start/2014/LayoutModification“>
<LayoutOptions StartTileGroupCellWidth=”6″ />
<DefaultLayoutOverride>
<StartLayoutCollection>
<defaultlayout:StartLayout GroupCellWidth=”6″>
<start:Group Name=”School business”>
<start:DesktopApplicationTile Size=”2×2″ Column=”2″ Row=”2″ DesktopApplicationLinkPath=”%ALLUSERSPROFILE%\Microsoft\Windows\Start Menu\Programs\Skype for Business 2016.lnk” />
<start:DesktopApplicationTile Size=”2×2″ Column=”0″ Row=”0″ DesktopApplicationLinkPath=”%ALLUSERSPROFILE%\Microsoft\Windows\Start Menu\Programs\Word 2016.lnk” />
<start:DesktopApplicationTile Size=”2×2″ Column=”4″ Row=”0″ DesktopApplicationLinkPath=”%ALLUSERSPROFILE%\Microsoft\Windows\Start Menu\Programs\PowerPoint 2016.lnk” />
<start:DesktopApplicationTile Size=”2×2″ Column=”4″ Row=”2″ DesktopApplicationLinkPath=”%APPDATA%\Microsoft\Windows\Start Menu\Programs\Classroom.url” />
<start:DesktopApplicationTile Size=”2×2″ Column=”2″ Row=”0″ DesktopApplicationLinkPath=”%ALLUSERSPROFILE%\Microsoft\Windows\Start Menu\Programs\Excel 2016.lnk” />
<start:DesktopApplicationTile Size=”2×2″ Column=”0″ Row=”2″ DesktopApplicationLinkPath=”%ALLUSERSPROFILE%\Microsoft\Windows\Start Menu\Programs\OneNote 2016.lnk” />
</start:Group>
<start:Group Name=”Usefull”>
<start:Tile Size=”2×2″ Column=”0″ Row=”0″ AppUserModelID=”Microsoft.MicrosoftEdge_8wekyb3d8bbwe!MicrosoftEdge” />
<start:Tile Size=”2×2″ Column=”2″ Row=”0″ AppUserModelID=”Microsoft.WindowsCalculator_8wekyb3d8bbwe!App” />
</start:Group>
</defaultlayout:StartLayout>
</StartLayoutCollection>
</DefaultLayoutOverride>
</LayoutModificationTemplate>
- You can change your Taskbar, too
Here you only add <CustomTaskbarLayoutCollection>
- Use <taskbar:UWA> and AUMID to pin Universal Windows Platform Apps.
- Use <taskbar:DesktopApp> and Desktop Application Link Path to pin Desktop Applications.
For this AUMID I wrote a script that gets all App information you implement here:
| get_installed_apps.ps1 |
To run this script just use this command:
powershell.exe –ExecutionPolicy Bypass .\get_installed_apps.ps1 -output “c:\temp\installed_apps.txt”
Just change save path like -output parameter.
Now we put additional information to our myStartMenu.xml (first the original XML):
<?xml version=“1.0” encoding=“utf-8”?>
<LayoutModificationTemplate
xmlns:defaultlayout=“http://schemas.microsoft.com/Start/2014/FullDefaultLayout”
xmlns=“http://schemas.microsoft.com/Start/2014/LayoutModification“
xmlns:start=“http://schemas.microsoft.com/Start/2014/StartLayout“
Version=“1”>
<LayoutOptions StartTileGroupCellWidth=”6″ />
<DefaultLayoutOverride>
<StartLayoutCollection>
<defaultlayout:StartLayout GroupCellWidth=”6″>
<start:Group Name=“School business”>
<start:DesktopApplicationTile Size=“2×2” Column=”2″ Row=”2″ DesktopApplicationLinkPath=“%ALLUSERSPROFILE%\Microsoft\Windows\Start Menu\Programs\Skype for Business 2016.lnk” />
<start:DesktopApplicationTile Size=“2×2” Column=“0” Row=“0” DesktopApplicationLinkPath=“%ALLUSERSPROFILE%\Microsoft\Windows\Start Menu\Programs\Word 2016.lnk” />
<start:DesktopApplicationTile Size=“2×2” Column=“4” Row=“0” DesktopApplicationLinkPath=”%ALLUSERSPROFILE%\Microsoft\Windows\Start Menu\Programs\PowerPoint 2016.lnk” />
<start:DesktopApplicationTile Size=“2×2” Column=“4” Row=“2” DesktopApplicationLinkPath=“%APPDATA%\Microsoft\Windows\Start Menu\Programs\Classroom.url” />
<start:DesktopApplicationTile Size=“2×2“ Column=“2” Row=“0” DesktopApplicationLinkPath=“%ALLUSERSPROFILE%\Microsoft\Windows\Start Menu\Programs\Excel 2016.lnk” />
<start:DesktopApplicationTile Size=“2×2” Column=“0” Row=“2” DesktopApplicationLinkPath=“%ALLUSERSPROFILE%\Microsoft\Windows\Start Menu\Programs\OneNote 2016.lnk” />
</start:Group>
<start:Group Name=“Usefull”>
<start:Tile Size=”2×2″ Column=”0″ Row=”0″ AppUserModelID=“Microsoft.MicrosoftEdge_8wekyb3d8bbwe!MicrosoftEdge” />
<start:Tile Size=”2×2″ Column=”2″ Row=”0″ AppUserModelID=“Microsoft.WindowsCalculator_8wekyb3d8bbwe!App” />
</start:Group>
</defaultlayout:StartLayout>
</StartLayoutCollection>
</DefaultLayoutOverride>
</LayoutModificationTemplate>
Here is our new XML. Differences/additions for Taskbar Manager are highlighted in yellow:
<?xml version=“1.0” encoding=“utf-8”?>
<LayoutModificationTemplate
xmlns=“http://schemas.microsoft.com/Start/2014/LayoutModification“
xmlns:defaultlayout=“http://schemas.microsoft.com/Start/2014/FullDefaultLayout“
xmlns:start=“http://schemas.microsoft.com/Start/2014/StartLayout“
xmlns:taskbar=“http://schemas.microsoft.com/Start/2014/TaskbarLayout“
Version=“1”>
<LayoutOptions StartTileGroupCellWidth=“6” StartTileGroupsColumnCount=“1” />
<DefaultLayoutOverride>
<StartLayoutCollection>
<start:DesktopApplicationTile Size=“2×2” Column=”2″ Row=”2″ DesktopApplicationLinkPath=“%ALLUSERSPROFILE%\Microsoft\Windows\Start Menu\Programs\Skype for Business 2016.lnk” />
<start:DesktopApplicationTile Size=“2×2” Column=“0” Row=“0” DesktopApplicationLinkPath=“%ALLUSERSPROFILE%\Microsoft\Windows\Start Menu\Programs\Word 2016.lnk” />
<start:DesktopApplicationTile Size=“2×2” Column=“4” Row=“0” DesktopApplicationLinkPath=”%ALLUSERSPROFILE%\Microsoft\Windows\Start Menu\Programs\PowerPoint 2016.lnk” />
<start:DesktopApplicationTile Size=“2×2” Column=“4” Row=“2” DesktopApplicationLinkPath=“%APPDATA%\Microsoft\Windows\Start Menu\Programs\Classroom.url” />
<start:DesktopApplicationTile Size=“2×2“ Column=“2” Row=“0” DesktopApplicationLinkPath=“%ALLUSERSPROFILE%\Microsoft\Windows\Start Menu\Programs\Excel 2016.lnk” />
<start:DesktopApplicationTile Size=“2×2” Column=“0” Row=“2” DesktopApplicationLinkPath=“%ALLUSERSPROFILE%\Microsoft\Windows\Start Menu\Programs\OneNote 2016.lnk” />
</start:Group>
<start:Group Name=“Usefull”>
<start:Tile Size=”2×2″ Column=”0″ Row=”0″ AppUserModelID=“Microsoft.MicrosoftEdge_8wekyb3d8bbwe!MicrosoftEdge” />
<start:Tile Size=”2×2″ Column=”2″ Row=”0″ AppUserModelID=“Microsoft.WindowsCalculator_8wekyb3d8bbwe!App” />
</start:Group>
</defaultlayout:StartLayout>
</StartLayoutCollection>
</DefaultLayoutOverride>
<CustomTaskbarLayoutCollection PinListPlacement=“Replace”>
<defaultlayout:TaskbarLayout>
<taskbar:TaskbarPinList>
<taskbar:UWA AppUserModelID=“Microsoft.MicrosoftEdge_8wekyb3d8bbwe!MicrosoftEdge” />
<taskbar:DesktopApp DesktopApplicationLinkPath=“%APPDATA%\Microsoft\Windows\Start Menu\Programs\System Tools\File Explorer.lnk” />
</taskbar:TaskbarPinList>
</defaultlayout:TaskbarLayout>
</CustomTaskbarLayoutCollection>
</LayoutModificationTemplate>
Example above Default Taskbar Icons still exist. If you like to remove Default Taskbar Icons just expand CustomTaskbarLayoutCollection with PinListPlacement argument “Replace”.
<CustomTaskbarLayoutCollection PinListPlacement=“Replace”>
This is highlighted in green in example above.
There are more possibilities to “tweak” your Taskbar. You can have a language based setting, too. Look here for other possibilities: Configure Taskbar by country or region <https://docs.microsoft.com/en-us/windows/configuration/configure-windows-10-taskbar?WT.mc_id=docs-facebook>
- Here you could only change your Taskbar
For this just delete following XML-File content <DefaultLayoutOverride>
Example:
<?xml version=“1.0” encoding=“utf-8”?>
<LayoutModificationTemplate
xmlns=“http://schemas.microsoft.com/Start/2014/LayoutModification“
xmlns:defaultlayout=“http://schemas.microsoft.com/Start/2014/FullDefaultLayout“
xmlns:start=“http://schemas.microsoft.com/Start/2014/StartLayout“
xmlns:taskbar=“http://schemas.microsoft.com/Start/2014/TaskbarLayout“
Version=“1”>
<CustomTaskbarLayoutCollection PinListPlacement=“Replace”>
<defaultlayout:TaskbarLayout>
<taskbar:TaskbarPinList>
<taskbar:DesktopApp DesktopApplicationLinkPath=“%APPDATA%\Microsoft\Windows\Start Menu\Programs\Accessories\Internet Explorer.lnk”/>
<taskbar:DesktopApp DesktopApplicationLinkPath=“%ALLUSERSPROFILE%\Microsoft\Windows\Start Menu\Programs\Accessories\Paint.lnk” />
<taskbar:UWA AppUserModelID=“Microsoft.Office.Word_8wekyb3d8bbwe!microsoft.word” />
</taskbar:TaskbarPinList>
</defaultlayout:TaskbarLayout>
</CustomTaskbarLayoutCollection>
</LayoutModificationTemplate>
-
- Customize XML with more settings
For example add Internet Explorer Link to Taskbar and/or Start Menu.
Here we see how to import Internet Explorer to Taskbar or Start Menu:
<DefaultLayoutOverride>
<StartLayoutCollection>
<start:DesktopApplicationTile Size=“2×2” Column=”2″ Row=”2″ DesktopApplicationLinkPath=”%ALLUSERSPROFILE%\Microsoft\Windows\Start Menu\Programs\Accessories\Internet Explorer.lnk”/>
</start:Group>
</defaultlayout:StartLayout>
Here an example for Taskbar:
<CustomTaskbarLayoutCollection PinListPlacement=“Replace”>
<defaultlayout:TaskbarLayout>
<taskbar:TaskbarPinList>
<taskbar:DesktopApp DesktopApplicationLinkPath=”%ALLUSERSPROFILE%\Microsoft\Windows\Start Menu\Programs\Accessories\Internet Explorer.lnk”/>
<taskbar:DesktopApp DesktopApplicationLinkPath=“%ALLUSERSPROFILE%\Microsoft\Windows\Start Menu\Programs\Accessories\Paint.lnk” />
<taskbar:UWA AppUserModelID=“Microsoft.Office.Word_8wekyb3d8bbwe!microsoft.word” />
</taskbar:TaskbarPinList>
</defaultlayout:TaskbarLayout>
</CustomTaskbarLayoutCollection>
Script for an all-in-one-solution:
Import-StartLayout -LayoutPath $PSScriptRoot\MyStartMenu.xml -MountPath $env:SystemDrive\
Copy-Item -Path $PSScriptRoot’\Internet Explorer.lnk’ -Destination $env:SystemDrive’\ProgramData\Microsoft\Windows\Start Menu\Programs\Accessories’
From <http://ccmexec.com/2015/09/customizing-the-windows-10-start-menu-and-add-ie-shortcut-during-osd/>
And the final step is to create a Tasksequence Step: just use the Link from Jörgen
Or create a Package with the XML-File and add a command into the TS-step
Import-StartLayout -LayoutPath $PSScriptRoot\StartMenu.xml -MountPath $env:SystemDrive\
-
-
Use following XML:
- Deploy it by script
-
Start layout XML for desktop editions of Windows 10 (reference)
-
- Deploy it by GPO
Customize Windows 10 Start and Taskbar with Group Policy
-
- Deploy it by Config Manager Task sequence
Customize Windows 10 Start and Taskbar with provisioning packages
-
- Deploy it with Intune for MDM managed Devices
Customize Windows 10 Start and Taskbar with mobile device management (MDM)
- Have fun!
Hope this will help you. Please test your decisions in a LAB first before implement to production.
Have a wonderful day.
———————————————————————————————————————————————————–
These links were used for this Blog Post. Now my work is done!
- Configure Windows 10 Taskbar https://docs.microsoft.com/en-us/windows/configuration/configure-windows-10-taskbar?WT.mc_id=docs-facebook
- Customize Windows 10 Start and Taskbar with mobile device management (MDM) https://docs.microsoft.com/en-us/windows/configuration/customize-windows-10-start-screens-by-using-mobile-device-management
- Find the Application User Model ID of an installed App https://msdn.microsoft.com/windows/hardware/commercialize/customize/enterprise/find-the-application-user-model-id-of-an-installed-app
- Add image for secondary Microsoft Edge Tiles https://docs.microsoft.com/en-us/windows/configuration/start-secondary-tiles
Leave a Reply