Here we go with another post about the easy Tasksequence to manage inplace upgrade to the next Version of Windows 10 in your environment.
In a Config Manager driven Infrastructure, it’s the best you can do, to update your Windows 10 Clients by a OS-Deployment Tasksequence, for sure you can also Use the integrated Servicing feature.
I really like the Servicing mindset, but it has some limitations, these limitations are very often showstoppers and can halt the roll out of the latest version.
Limitations with Servicing:
- x86/x64 bit download
- Language Pack integration
- Driver Handling (Bluetooth)
- BISO / UEFI change
- Control
In such cases we can use a Tasksequence instead, there are a lot of upsides doing so. You reach a much higher flexibility than you might expect.
Upsides:
- Control (Status Messages)
- Pre-steps to update drivers or uninstall applications
- Setup.exe pre-run, with returned Error codes
- Handle error codes and run steps
- Post steps to install new applications
- Post steps to configure settings you need
- Language Pack handling with Pre and Post actions
- x86/x64 control
In this case I created a Tasksequence that you can download. I’ve integrated the most important steps for you and tested it in my LAB and On-Site. It is also running in some environments productively already.
This Tasksequence has some challenges. We need to check first if the OS is ready to be updated, and then we need to first update a driver and after uninstalling an application. We then need to acquire the user language, to bring the right Language back to the system after the upgrade and finally install the latest version of the application on to the System.
If you like to check the installed OS language that you will use to update, you can just run this PoSh command
Get-WmiObject -Class win32_operatingsystem | select oslanguage
The Return Value would be 1033 or so.
All the Language Codes are Listed here:
https://technet.microsoft.com/en-us/library/cc287874(v=office.12).aspx
In this Language you have to download the ISO file, with the right Language.
———————————————————————————————————————-
Here we go with the Step by Step guide to implement and run it:
First of all we create an upgrade OS Tasksequence with the Create Task Sequence Wizard.
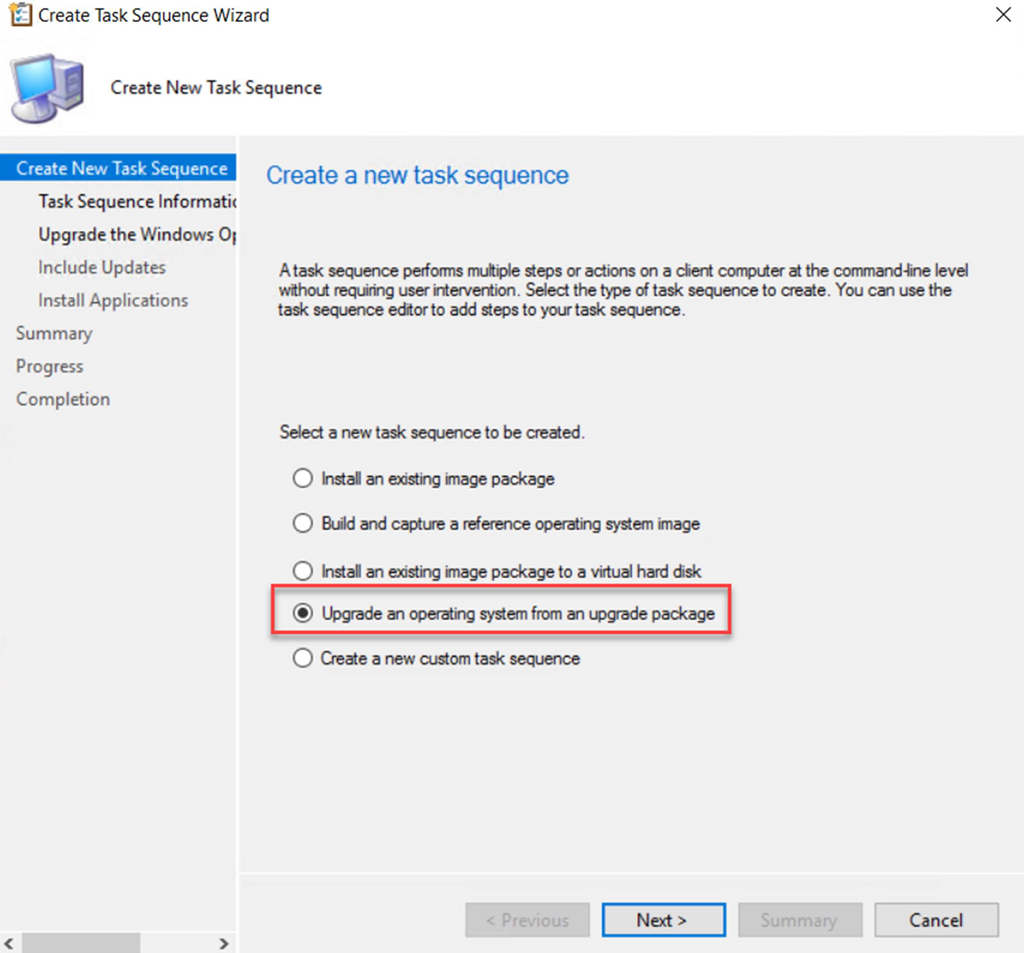
This will create a Tasksequence with some steps in it to use from Best Practice from the ConfigMgr PG
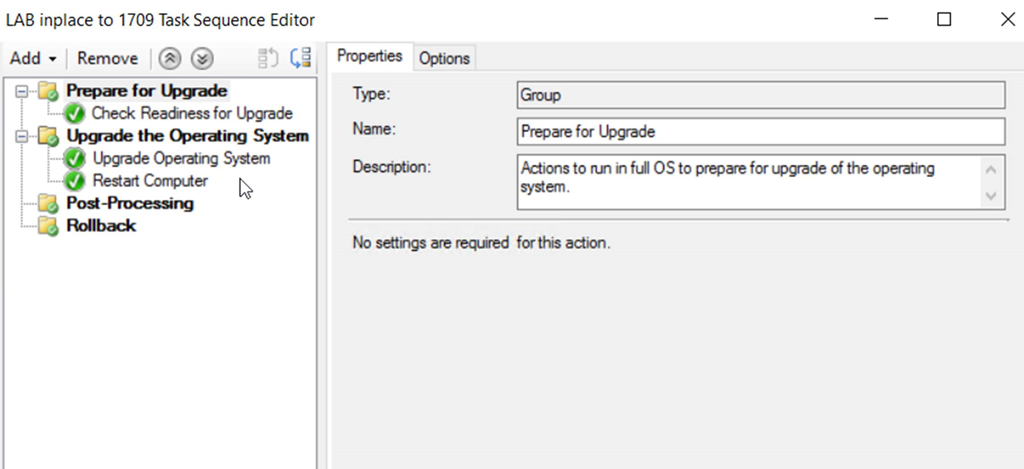
Now we have to have to implement steps for our own need’s and alter some of the generated steps.
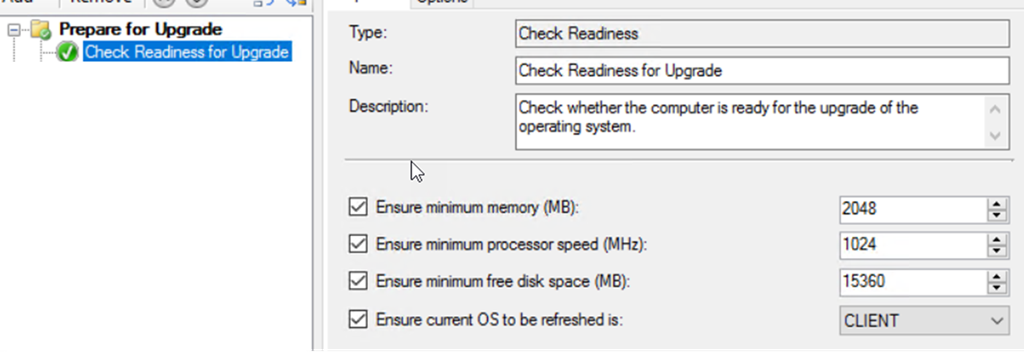
First, let us check the basic readiness of the system to be upgraded.
In the next step we like to figure out the current user language.:
For this task we use a PowerShell script:
https://github.com/slaet/SCCM_Scripts/blob/master/getLanguage.ps1
$tsenv = New-Object -ComObject Microsoft.SMS.TSEnvironment
$cultureInfo = Get-UICulture
$setLanguage = switch ($cultureInfo.LCID)
{
‘1031’ {“de_UI.xml”}
‘1033’ {“en_UI.xml”}
‘1036’ {“fr_UI.xml”}
‘1040’ {“it_UI.xml”}
Default {“de_UI.xml”}
}
$tsenv.Value(“OSLang”) = $setLanguage
This script you can run as a run command:
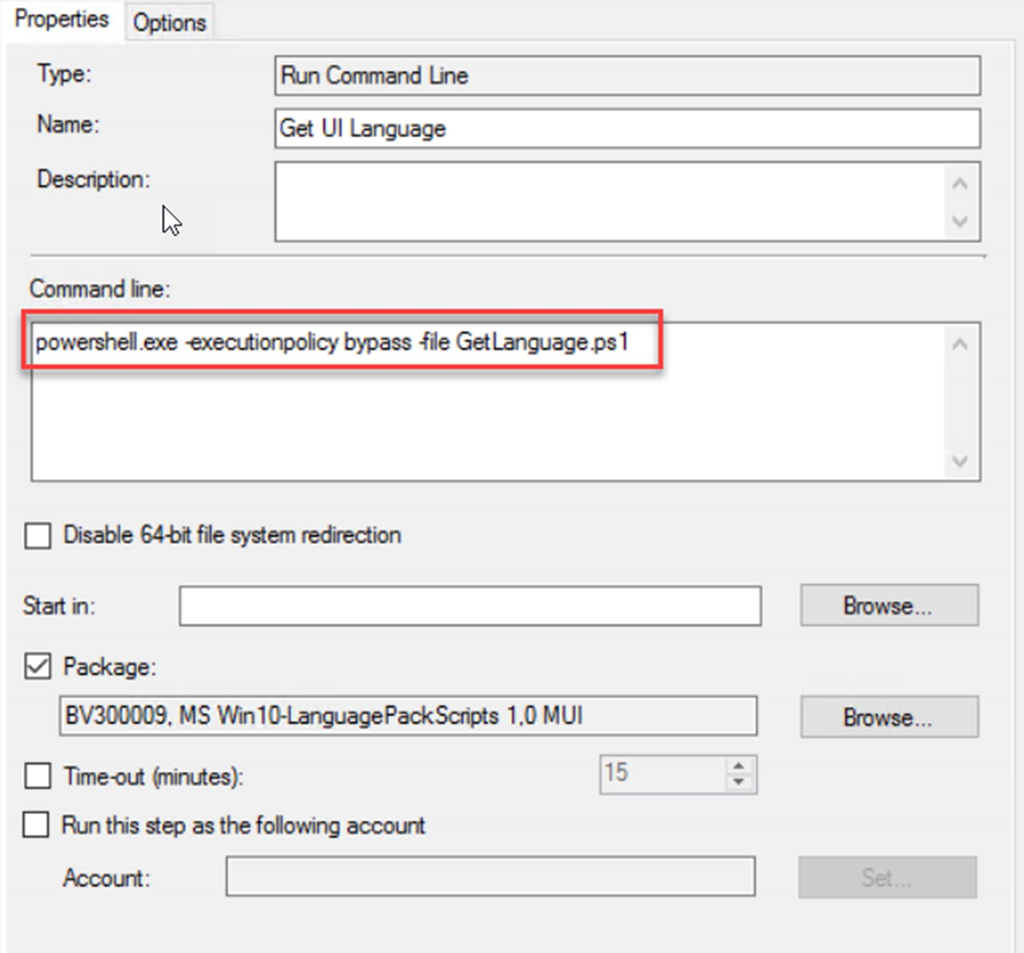
Here the command:
powershell.exe -executionpolicy bypass -file GetLanguage.ps1
(Thank you, Daniel Schaedler, for helping with the script!)
For using the variables, that are filled in the script, back in the TS, you can use the OSLang as variable and the properties xx_UI.xml. I use a file format as a property, in this case you can use this in a step of the TS to have the right file for the language.
As response in a Post step, you can add the following command in a run command step:
![Computergenerierter Alternativtext: Properties Cptions Type: Commmd he: Run Cornrnand Line Set UI Language control intl Cpl. [3 Disable 64-bit file systan redrection •art h: Package. C] Time-cni trinutes): [3 Run this st<' as the foUoWng account 15](http://blog.colemberg.ch/wp-content/uploads/imported-onenote-images/onenote-5adb0ec99db9d6.54342545.png)
We will come back to this step later, with the explanation and how it works.
After this, you can use the variable in the TS, for any language you have installed, it is not dynamic, that means only languages supported in our own environment can be used for the update.
If users are free to install theier own language trough the Settings Center in the Regional Settings, you will have to change the script to be more variable. You also have to be flexible to download the languages which are needed from a share where you have place all language CAB files All this is possible but a lot more work for you as an admin, Changes which need to be changed with new versions and so on; a lot more work for you. In this case I expect that you inform user to manage these settings by himself, and after an update to the next feature update (Win10 Build) it’s always English, and the user can then install whatever language he desires.
In the next step we use “Upgrade Operating System”:
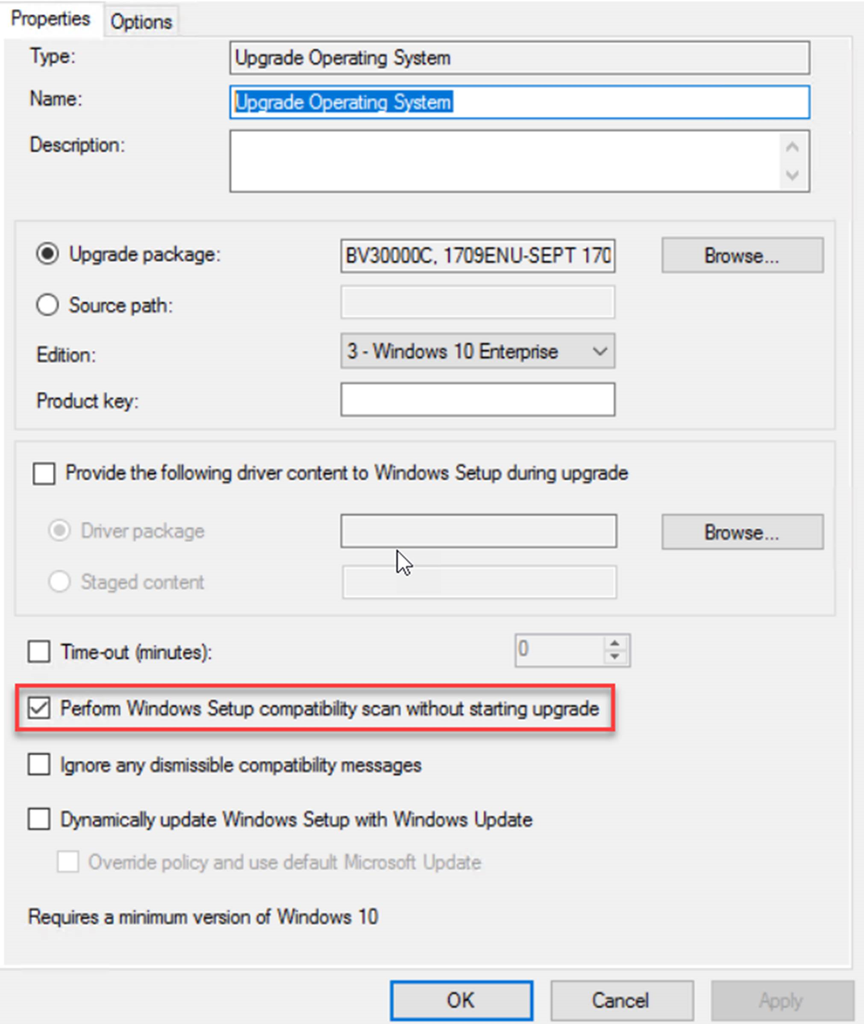
With “Perform Windows Setup compatibility scan without starting upgrade” you can handle the Error Codes. There is a blog post from Microsoft Michael Niehaus which explains how it works:
(You’ll see these return codes as large negative numbers, but they are much easier to look at in hex.)
No issues found: 0xC1900210 // Translated to Decimal 3247440400
Compatibility issues found (hard block): 0xC1900208 // Translated to Decimal 3247440392
Migration choice (auto upgrade) not available (probably the wrong SKU or architecture)· 0xC1900204 // Translated to Decimal 3247440388
Does not meet system requirements for Windows 10: 0xC1900200 // Translated to Decimal 3247440384
Insufficient free disk space: 0xC190020E // Translated to Decimal 3247440398
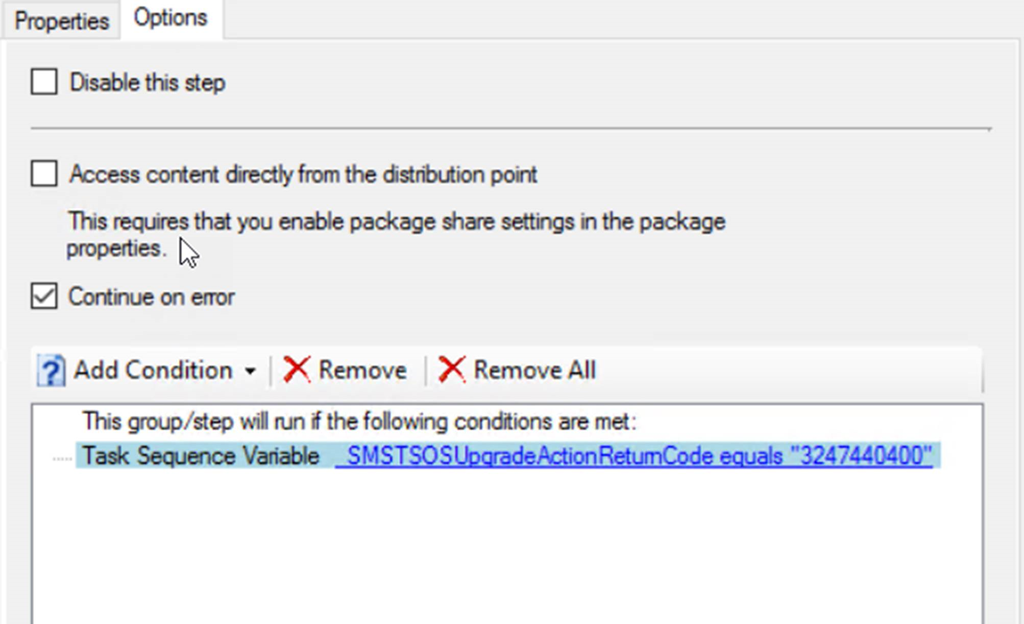
There is a built-in variable you can use to catch the error code for the next step, this variable’s name is: _SMSTSOSUpgradeActionReturnCode and the decimal value you need for success is 3247440400
With this you can create the step to Install Windows, just use in the ” Task Sequence Variable”
Use the “Apply OS Image”
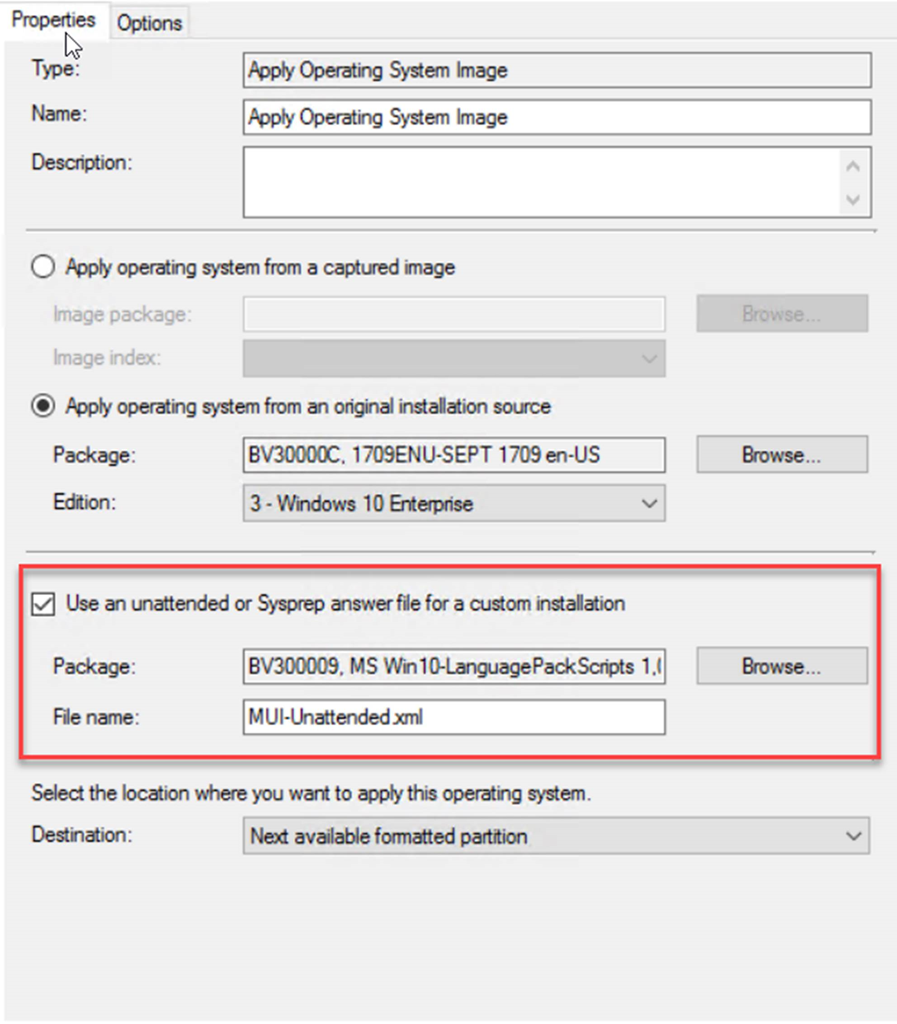
In this case you can also add your unattended.xml file with some configurations of your liking.
(Now we are back to use the language variable from the PowerShell script before)
If you have different languages, it is possible to integrate them first with DISM.exe to the install.wim file in your ISO source, and handle the installation of your languages with Collection / Device variables in the unattended.xml file, or you can install the language packages later in this TS, here is blog post from a long time ago to add language packs during TS: http://blog.colemberg.ch/2011/03/how-i-can-implement-w7-os-languages-zero-touch-via-sccm-os-capturing/ Also check the comments, there are some other solutions, which still work with Win10.
In the unattended.xml file you can also use the Variables for the Language selection.
If you also like to use the variable from the GetLanguage.ps1 script you have to change the values before:
We create a group for every Language to configure and add a Tasksequence variable, in the option of the group. We proceed to check the variable set in the script:
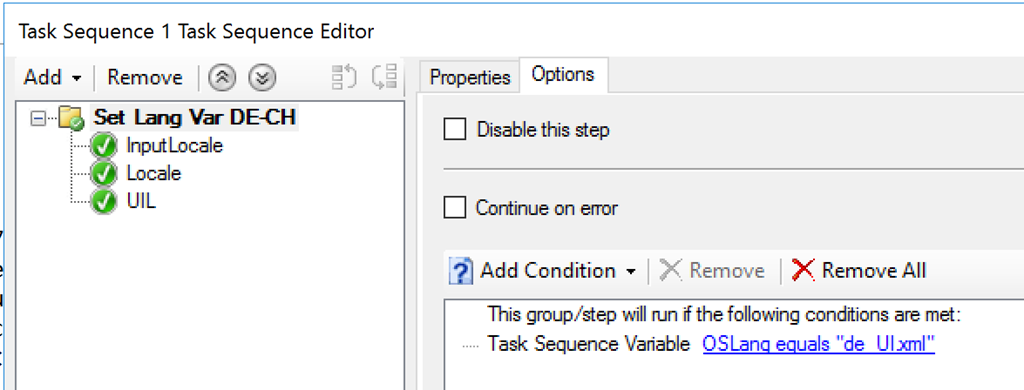
And add in the separate steps the right variables for the Unattended.xml file

Finally we update the unattended.xml, with the variables:
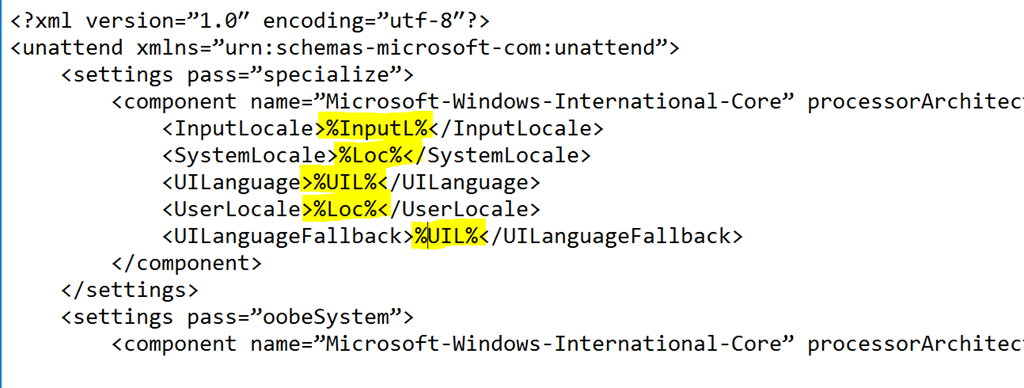
Save the file and create a package and use it in the “Apply OS Step” (see screenshot above)
If you don’t need any Unattended.xml, you can also use the same step as before (“Upgrade Operating System”) and use here the option to get the success or “error” Return code.
In this step, the OS would be downloaded again, if you don’t want to do that, you can also use the steps above without the TS. Just run every step manually as a run command line.
PS: Use the step “Download Package Content”
After we installed the OS, we come to the Post actions in the TS:
Integration of the language, that was installed prior to update. For this, I used a mix from the two solutions from Roger Zander on his blog (thanks for sharing Roger) http://rzander.azurewebsites.net/how-to-change-the-welcome-screen-language-in-win10/ and Thomas Kurth https://blog.basevision.ch/2016/07/windows-10-language-settings-with-store-apps/.
Or install any new application you like, set some regkeys, etc.
Now we can clean up the OS! That means we have to delete the Windows.old folder and give the system ~20GB space back, so that other stuff can run without filling the Hard Drive. For this purpose I used the blog Martin has written: https://blog.hosebei.ch/2017/11/06/windows-10-remove-windows-old-folder/, It’s an article about how to clean up the disk with the cleaner tool that shipped with Windows (always use onboard tools when there is no need for 3rd party).
Here is the integration I have done to build the TS step by step. How it works, you can read on Martins Blog (Thank you for sharing)
For sure, in today’s Win10 deployment you usually find many Solutions like autopilot, Delivery Optimization, Servicing, etc. But old school still works great 😉
Hope it helps and saves you some time to enjoy a beer 🙂, this Post is as is, test it first and do your test in a LAB before implementing it to production.
Leave a Reply