Hi all
If you like to install Office 2016 (O365 pro plus) with click to run? You like to install it the modern or future way with the Bits from the O365 Tenant that every User have access to and also can install on 4 additional Computers (at home). Then you are at the right spot here to learn how.
First of all we have some different sources that helps us to get the right Applications and also download them to deploy it with SCCM / Intune.
We have to learn and understand about the Versions and Build Numbers for the New Office way:
Or in German
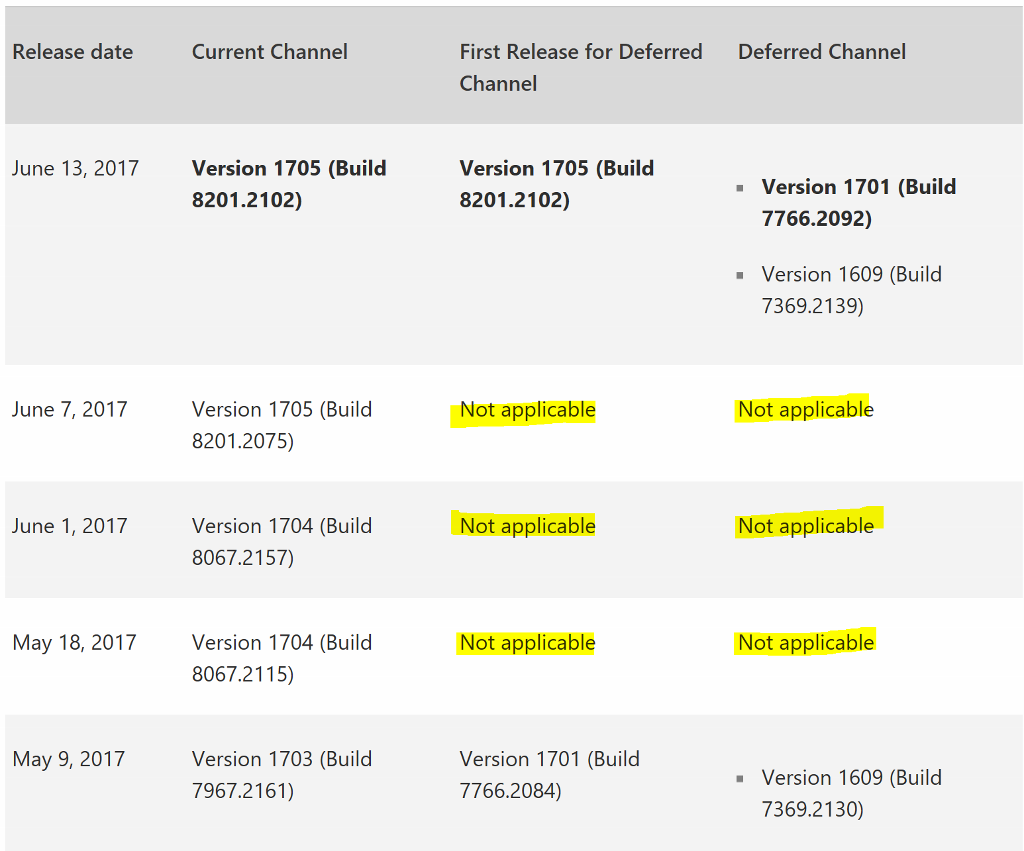
On this link MS tells us we have 4 different Channels:
| Channel | Version | Build | Release date |
| Current | 1705 | 8201.2102 | June 13, 2017 |
| First Release for Deferred | 1705 | 8201.2102 | June 13, 2017 |
| Deferred | 1701 | 7766.2092 | June 13, 2017 |
| Deferred1 | 1609 | 7369.2139 | June 13, 2017 |
1 There are always two versions of Deferred Channel that are supported. Version 1701 contains newer features and is supported until January 2018. Version 1609 is supported only until September 2017.
There are also information’s about the Support duration for the different channels.
These versions and build numbers apply to the following Office 365 clients:
Office 365 ProPlus
Office 365 Business
Visio Pro for Office 365
Project Online Desktop Client
Here are also an overview about the Channels: https://support.office.com/en-us/article/Overview-of-update-channels-for-Office-365-ProPlus-9ccf0f13-28ff-4975-9bd2-7e4ea2fefef4
For some Version’s you have to be careful, they never become an next channel version, that means, if you like to prepare an Image (Capturing) and you have the wrong version of Office installed, they never get an update to next version trough the channels, so only use versions that have versions to the channels:
For the different channels you need to know about the size of the Version, that you can calculate the diskspace in your environment, here we go: https://support.office.com/en-us/article/Download-sizes-approximate-for-channel-updates-to-Office-365-ProPlus-190f41e4-064d-486b-9c95-db08f973687c
This was Pre start information you need to know before you begin.
Now we like to start to configure the Setup and Runtime routine and implementing it to SCCM. A friend of mine (Ronni Pedersen), has done that in the past and published a document in the gallery.technet.microsoft.com area
https://gallery.technet.microsoft.com/How-to-Deploying-Office-dc4e6d04
But in my case I need more than just one language, we have also to install German, French and Italian
In the Support area from Microsoft you will find additional Information’s about how to configure an Office CTR setup:
Here is what we need;
- Setup.exe from the Office 365 Setup, this file is just a few MB big.
- With the EXE and a XML file we can first download the sources we need from Microsoft download Server
In the last link about the Setup information’s, we can create a XML by our self or we go to: https://officedev.github.io/Office-IT-Pro-Deployment-Scripts/XmlEditor.html and create with a “wizard” our needed XML file.
Here a step by step Guide to create a XML:
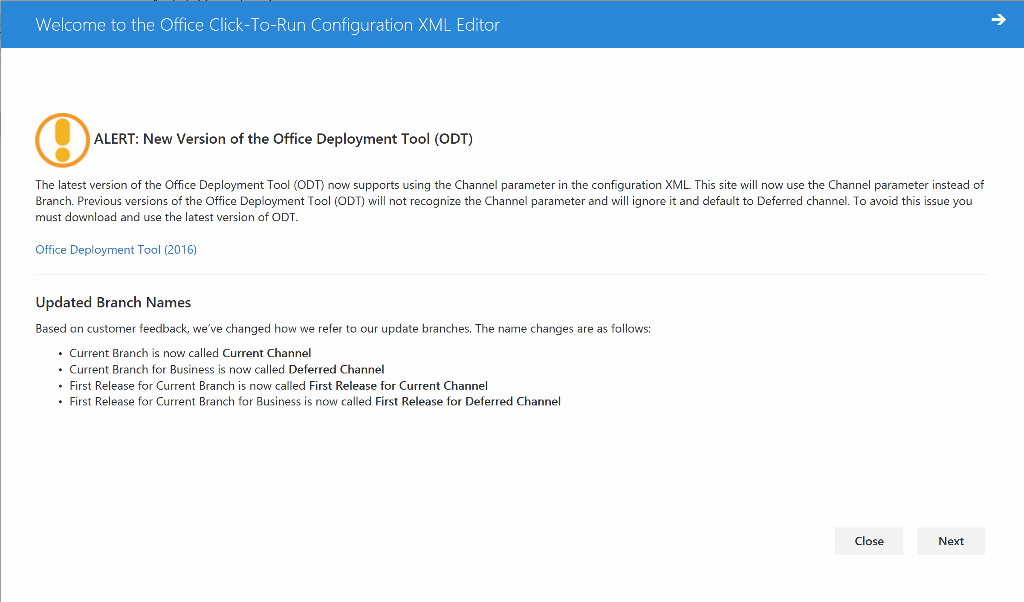
- Next
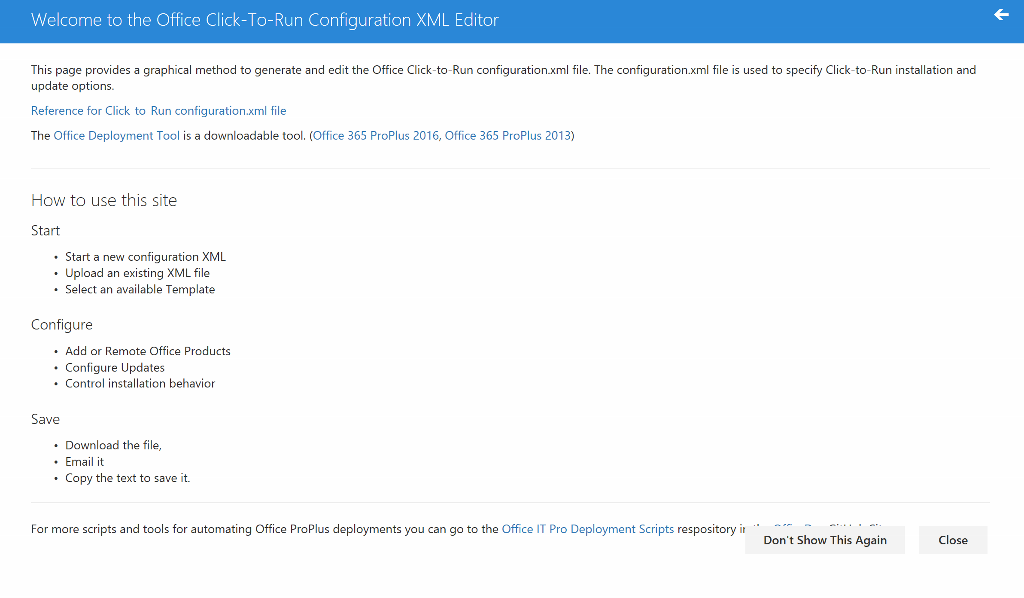
- Close
- Select your Version in the left corner (2016)
- Then select the Product Version
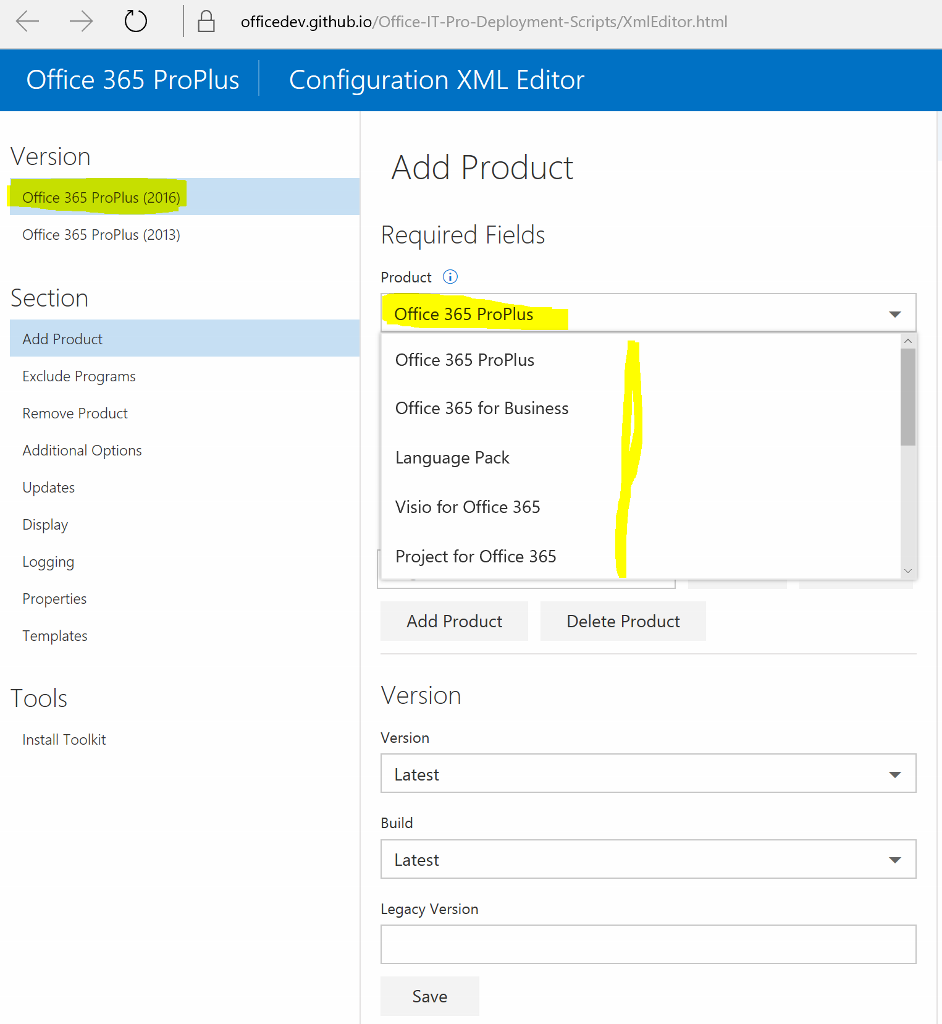
Additional here you can also select Language Packs and/or Visio and Project, but you have to this later on, at the moment you can only select one to configure, and generate the XML, when your finish with the first, select the next one and in the end you can merge all together.
-
- Select your channel
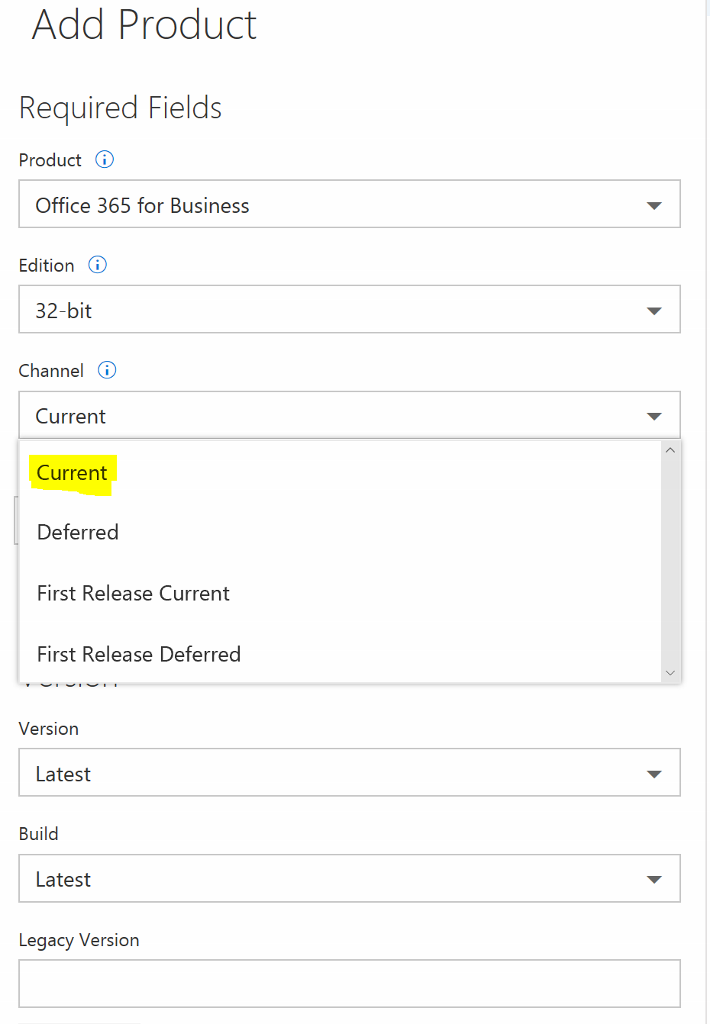
- With add Product
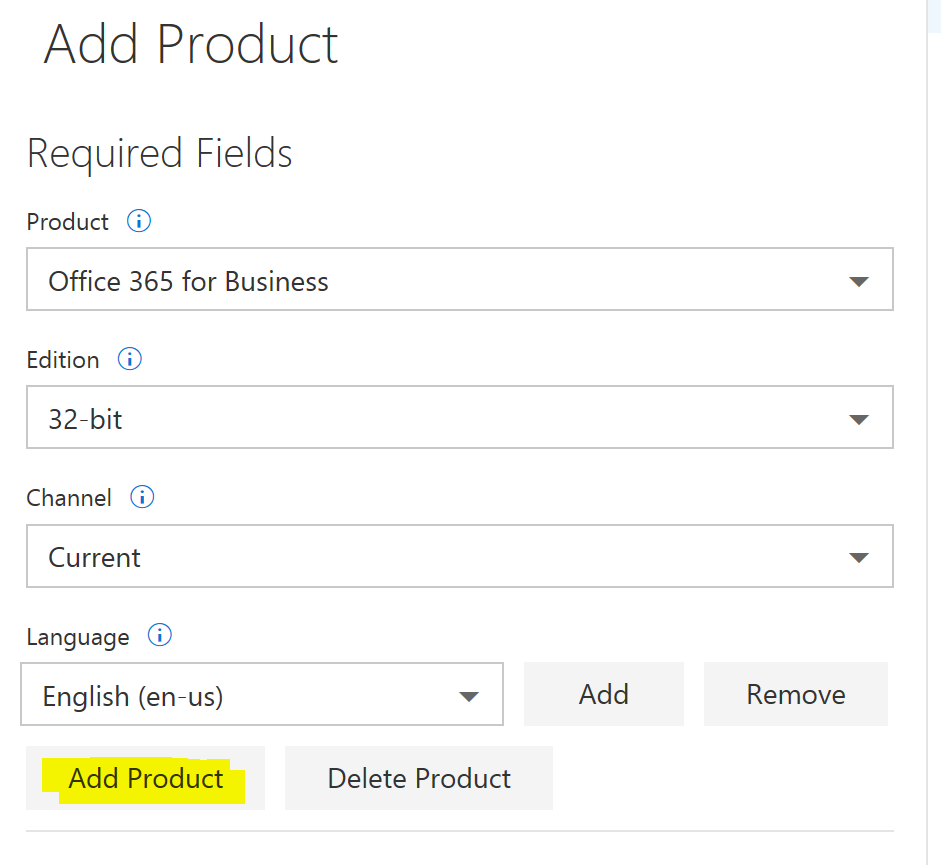
- You will generate the XML
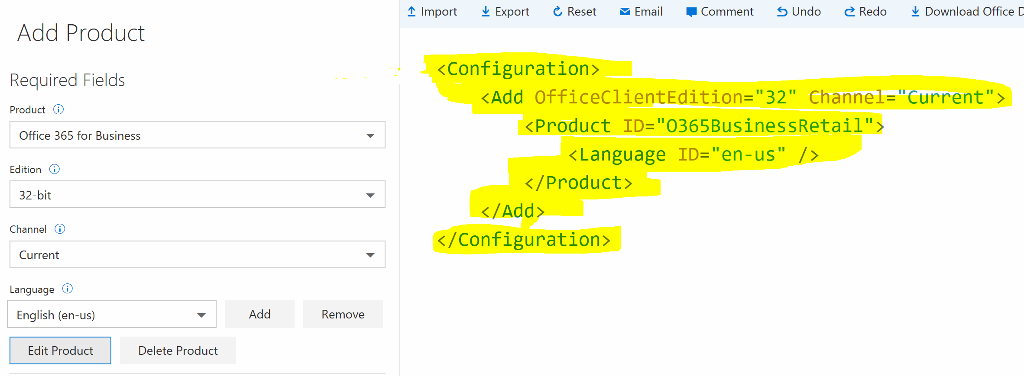
- Then you can add all your languages you need
<Configuration>
<Add OfficeClientEdition=”32″ Channel=”Current”>
<Product ID=”O365BusinessRetail”>
<Language ID=”en-us” />
<Language ID=”de-de” />
<Language ID=”fr-fr” />
<Language ID=”it-it” />
</Product>
</Add>
</Configuration>
-
- Not only the Languages you can add at this point also Visio for example, for this product you need also to add every language again, in the end it looks like this.
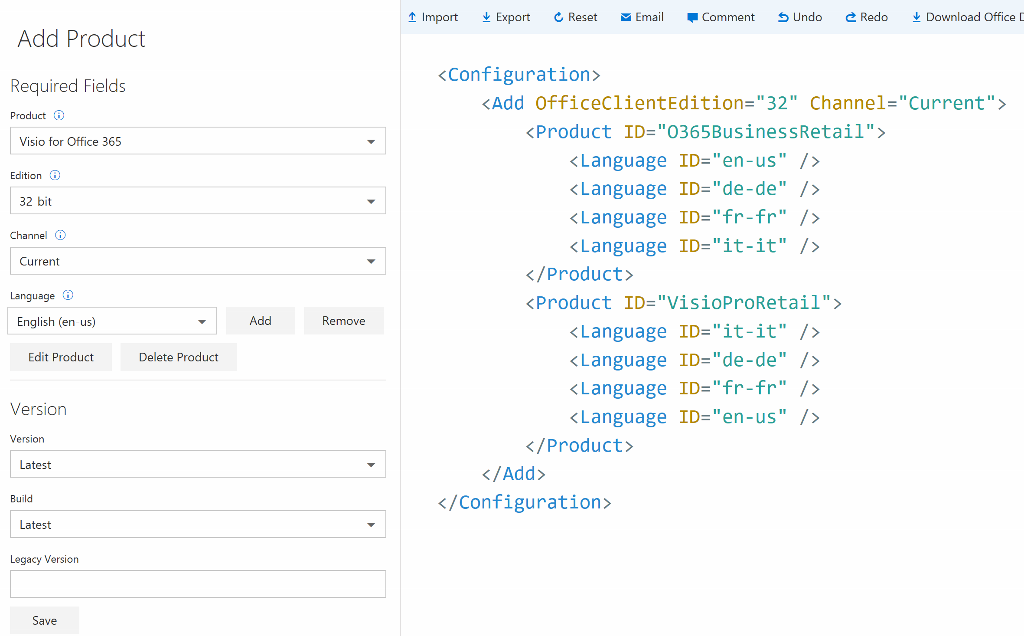
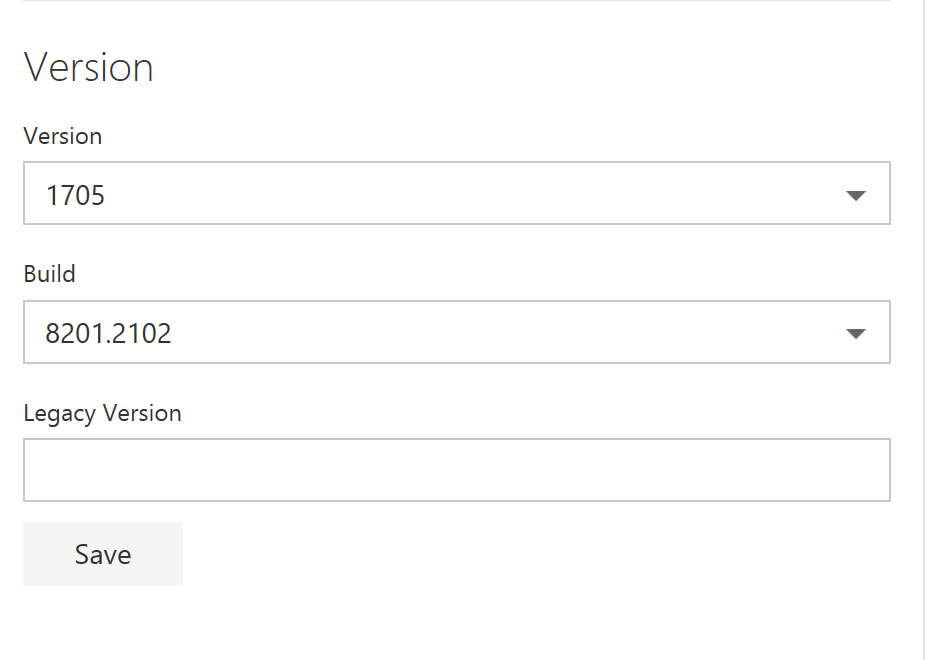
- Select the Version you plan to rollout, and also the build number you like
-
- But there is more, in the left side you can also select exclude and then choose your office Product and set the exclusion, if you don’t like to install the full office.
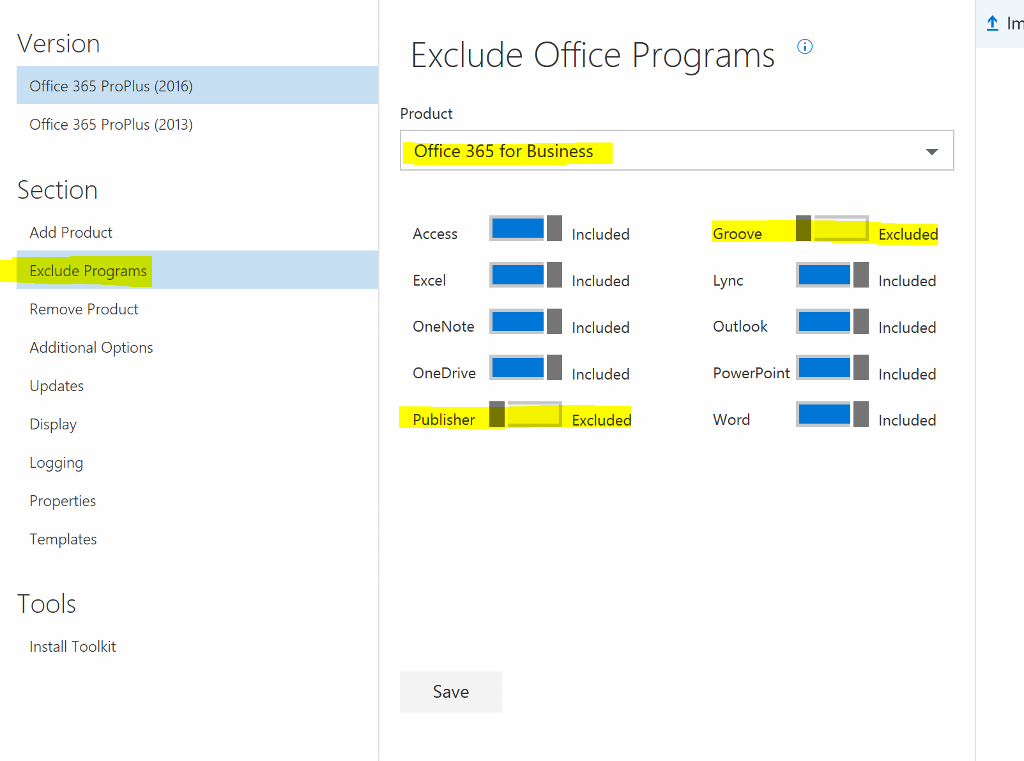
- Press Save and your XML get updated
<Configuration>
<Add OfficeClientEdition=”32″ Channel=”Current”>
<Product ID=”O365BusinessRetail”>
<Language ID=”en-us” />
<Language ID=”de-de” />
<Language ID=”fr-fr” />
<Language ID=”it-it” />
<ExcludeApp ID=”Groove” />
<ExcludeApp ID=”Publisher” />
</Product>
<Product ID=”VisioProRetail”>
<Language ID=”it-it” />
<Language ID=”de-de” />
<Language ID=”fr-fr” />
<Language ID=”en-us” />
</Product>
</Add>
</Configuration>
-
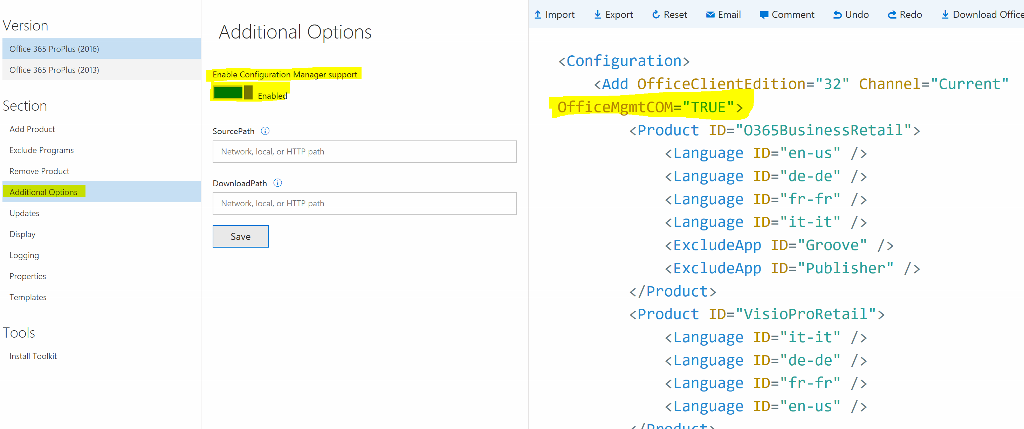
- If you like to manage the servicing with Configuration Manager, go to advanced Options
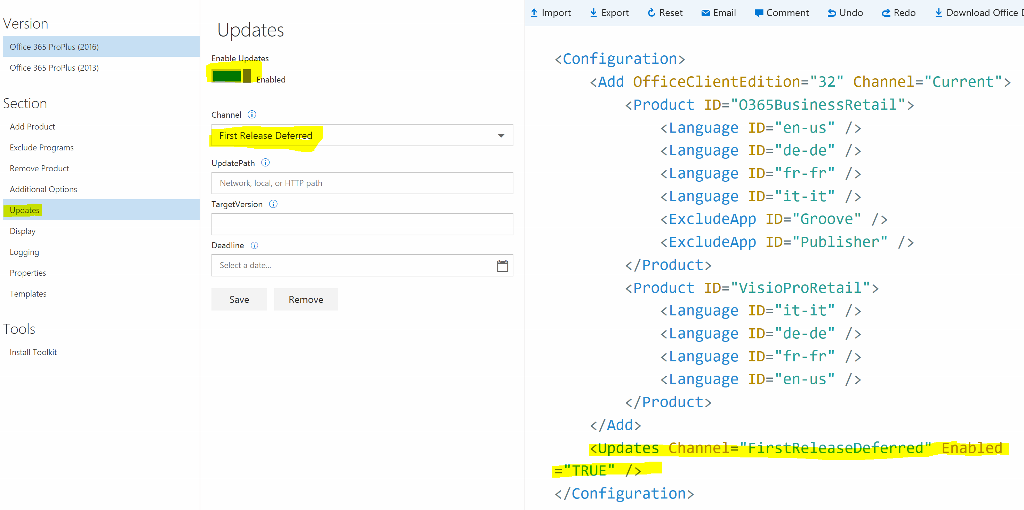
- Don’t forget the Updates
-
- Hide any Screen during deployment
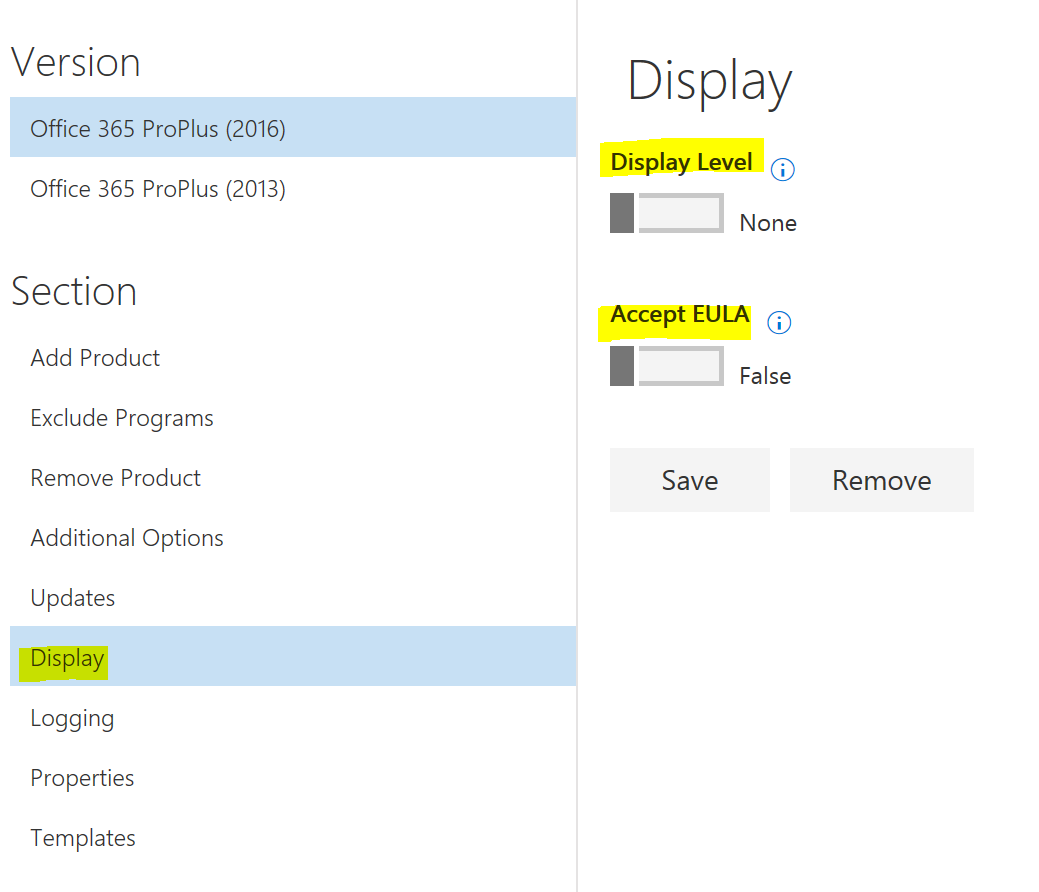
- Add anything you need and always use the Save button, in the end you get a XML like this
<Configuration>
<Add OfficeClientEdition=”32″ Channel=”Current” OfficeMgmtCOM=”TRUE”>
<Product ID=”O365BusinessRetail”>
<Language ID=”en-us” />
<Language ID=”de-de” />
<Language ID=”fr-fr” />
<Language ID=”it-it” />
<ExcludeApp ID=”Groove” />
<ExcludeApp ID=”Publisher” />
</Product>
<Product ID=”VisioProRetail”>
<Language ID=”it-it” />
<Language ID=”de-de” />
<Language ID=”fr-fr” />
<Language ID=”en-us” />
</Product>
</Add>
<Updates Channel=”FirstReleaseDeferred” Enabled=”TRUE” />
<Property Name=”AUTOACTIVATE” Value=”1″ />
<Property Name=”FORCEAPPSHUTDOWN” Value=”FALSE” />
<Property Name=”SharedComputerLicensing” Value=”0″ />
<Property Name=”PinIconsToTaskbar” Value=”FALSE” />
<Display Level=”None” AcceptEULA=”FALSE” />
</Configuration>
- Now you can save this file as Configuration.xml in the same share you have your setup.exe from office
-
In this case you can easy run this command setup.exe /download configuration.xml
- The download well end in the same directory as the setup.exe is started, and will create a separate subfolder. The Subfolder will be named with a Number, this number will match the Build number of your Office Version.
- If the download is completed, you can generate the Application Package in SCCM in the Guide That Ronni has written for the community.
- The next part is to have the right command, in this case we will use, the same command as we had for the download, instead of /download we use setup.exe /configure configuration.xml
- In case you like to have a Uninstall command, you can easy create a uninstall.xml file with the following sections
- This will remove the whole Office from your device with the command setup.exe /configure uninstall.xml
<Configuration>
<Remove All=”TRUE” />
</Configuration>
That’s it, hope you have fun and remember, this Article is as is, test it before run in Production, have Fun and enjoy a beer for the time you can save with this….
Leave a Reply