Hi All
In this Blog Post I like to share my solution to add devices that are ordered from a vender/OEM without getting the HashID from the vendor direct to the Microsoft Store for Business or Intune.
There are still some vendors and OEM that are not able to provide the HashID to you as a customer. So, that you can upload the information in to MSfB / Intune and assign a Autopilot profile. This was the reason for me to create this blog, especially I have some projects where the customers ordered many devices and would like to use the Easy Setup in the OOBE Phase with Autopilot and all the enrollment goodies.
During writing this blogpost Michael Niehaus was publishing a new Autopilot PowerShell module version, now it is the Version 2.1 from here:
https://www.powershellgallery.com/packages/WindowsAutoPilotIntune/2.1
In this case I was writing all the steps down, and then I found a new way to upload the Data to Intune.
The big reason for doing this effort, is simple, if you use the fantastic script and module from Niehaus you have to login with an account to get access to the Intune Graph API for uploading the information to Intune. My biggest pain was to have no account information in a script. Also no plain password details, that is why I create the solution with Azure Automation, to store the account and the password in there.
At the end you can create a bootable USB stick that loads a real Windows 10 (Win PE or BootImages are not working to get the HashID), in the end you can easy add a shutdown to the script, and you know when the OS is shooting down the Information’s will be stored on a Azure Blob-Storage. For the finish we just automate the rest.
I hope that is interesting enough to read this Blog, have fun …
Prerequisites
-
- Devices must be registered to the organization
- Company branding needs to be configured
- Network connectivity to cloud services used by Windows Autopilot
- Devices must pre-installed with Windows 10 Professional, Enterprise or Education, of version 1703 or later
- Devices must have access to the internet
- Azure AD Premium P1 or P2
- Users must be allowed to join devices into Azure AD
- Microsoft Intune or other MDM services to manage your devices
https://docs.microsoft.com/en-us/windows/deployment/windows-autopilot/windows-10-autopilot

UPDATE: After a few Weeks, this blog is Online, a Friend send me the Hand-Created Picture as a JPG and also as a VISIO file, here are the downloads for you,
and BIG THX to Pascal Vis from the Netherlands.
Click here for the Files
-
-
- Implementing Automation from Harvesting HashID’s from the Devices and store it on an Azure Blob Container
- Create an automation Process to load the Info’s direct to Intune
- Automate the assigenment from an Autopilot Profile to a Device Group
- Create a Bootable Media to start the automation from an Out of the Box Device
- Some details and configs in Intune that help you later on
-
-
Implementing Automation from Harvesting HashID’s from the Devices
First, I Prepare my Azure Tenant to use some Services to help me automate that HashID grabbing from the Devices.
For this I found the Blogpost from Peter van der Woude for the Start: https://www.petervanderwoude.nl/post/get-windows-autopilot-device-information-of-microsoft-intune-managed-devices/ Thank you Peter for Sharing this example.
During some research for this Blogpost I also struggle in to another blog from Oliver Kieselbach; https://oliverkieselbach.com/2017/11/16/gather-windows-10-autopilot-info-in-azure-blob-storage-during-wipe-and-reload/ Thank you Oliver
I used this two Blogs as my inspiration and got the following result!
step by Step:
1.1 Add Azure Blob Storage
1.2 Configure Blob Storage and Container and grab the keys we need
1.3 Copy the Script take the script to use
1.4 Run the Script and see what happen
1.1 Add Azure Blob Storage
Open the Azure portal and navigate to Storage accounts
Open storage accounts and add a new one
Configure it, give it a good name, CREATE
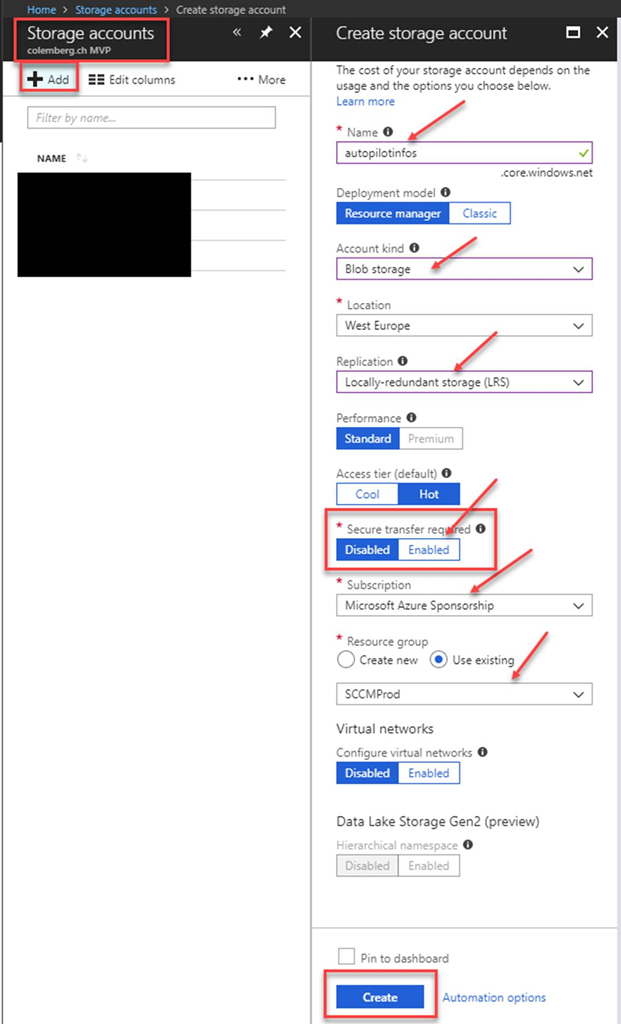
Secure Transfer required = YES
Save the Storage account Name, we need it in the Variable $StorageAccountName = “autopilotinfos”
1.2 Configure Blob Storage and Container for our Use
Open the Blob Storage and add a Container
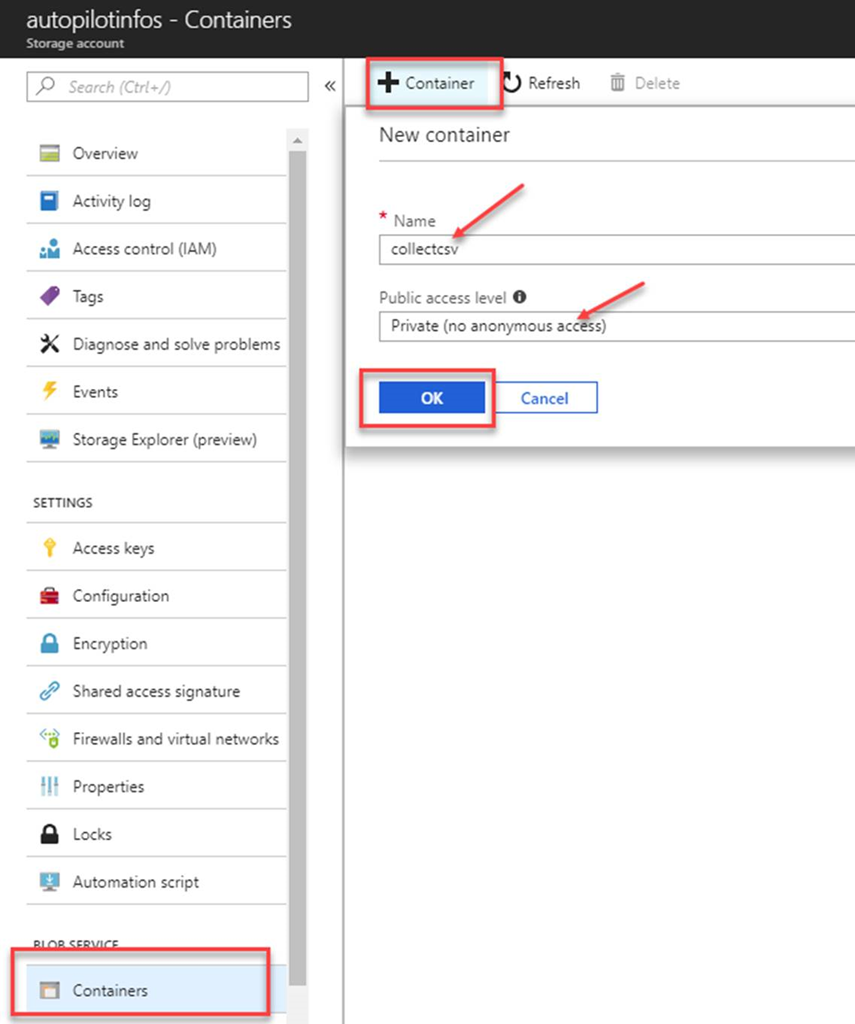
Save the Name of the Container we need it as the Variable $ContainerName = “collectcsv”
Go back to the Storage and open the Access Keys and copy the Key
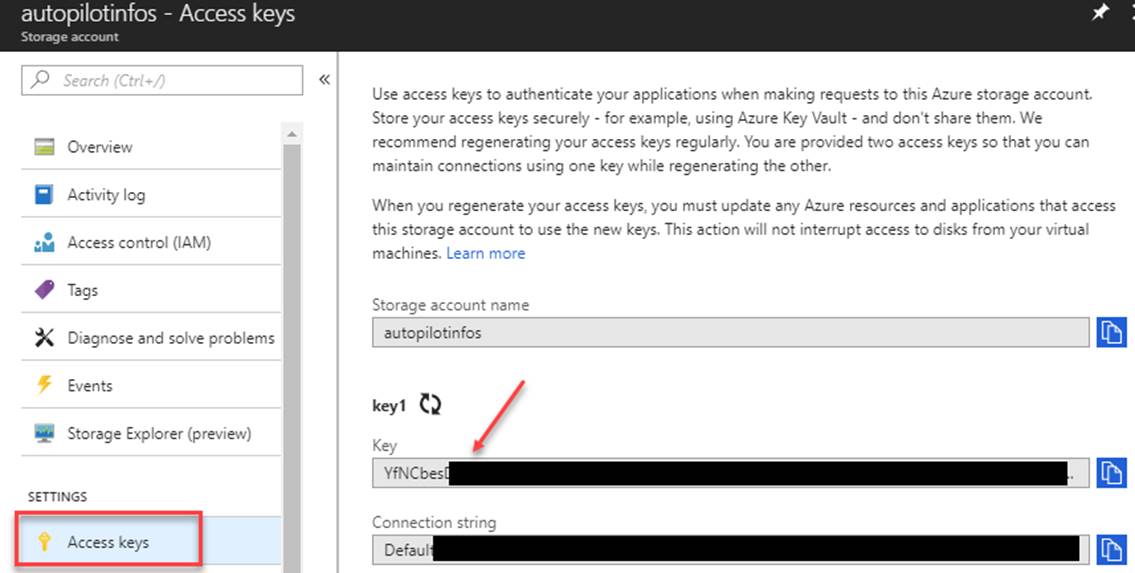
Save the Access key of the key1 we need it as the Variable $StorageAccountKey = “blablablajaddajadda”
1.3 Copy the Script take the script to use
Copy the Script from GitHub and add your Keys and Links:
https://github.com/slaet/IntuneScripts/blob/master/AutoPilotInformation_to_AzureBlob.ps1
(to run this script the Comuter needs Internet Access to download the Modules!)
Change the <StorageAccountKey>
Change the <StorageAccountName>
Change the <ContainerName>
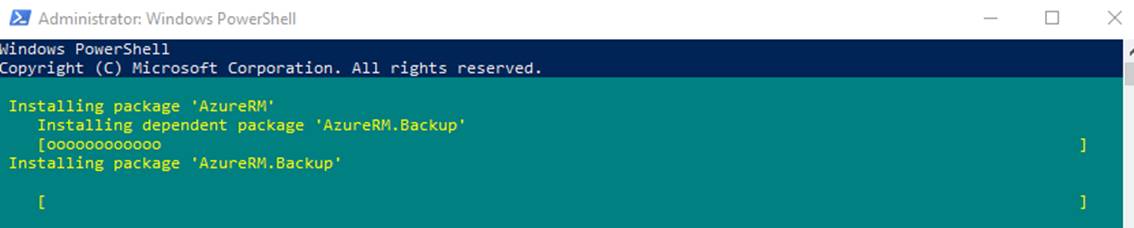
1.4 Run the Script and see what happen
Run the script with the following Command with evaluated rights:powershell -executionPolicy bypass -file “AutoPilotInformation_to_AzureBlob.ps1”
The result should show you one or many Files in the Container
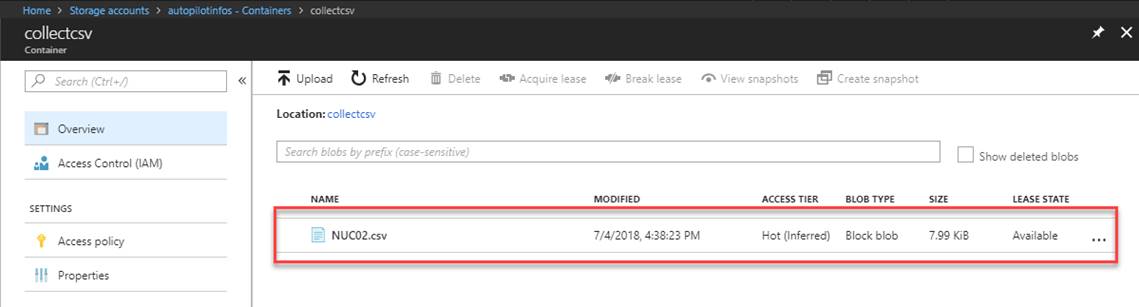
You can also open the script in PowerShell ISE and load all the variables and runGet-AzureStorageBlob -Container $ContainerName -Context $ctx | Select Name
Then you should see the file.
-
-
Create an automation process to load the device information direct to Intune
-
In the next steps we would like to load the CSV files in to Intune trough the Graph IPA for this we like to use Azure Automation.
Here is my step by Step:
2.1 Create an Azure Automation Account
2.2 Create the Automation Account (Service)
2.3. Adding the PowerShell Modules to the RunBook
2.4 Import the Script
2.1 First we must create an Automation Account
Add a new one and give it a name (AutopilotImport)
![Home Automation Acccunts Add Automation Account utomaüon ch MVP unts Edit columns Filter by name... PatchAutom ati on • More Add Automation Account Autopilotlmport Subscription Microsoft Azure Sponsorship Resource group C) Create new @ use existing Location West Europe Create Azure Run As account O The Run As account feature will create Run As account and a Classic Run As accountCick here to learn more about Run As accounts. Learn more about Automation pricing. Y] Pin to dashboard](http://blog.colemberg.ch/wp-content/uploads/imported-onenote-images/onenote-5b544f56a696c3.05822869.png)
Refresh the page and open the AutopilotImport account would be Visible
2.2 Create the Automation Account (Service)
For this you can use a separate account, or you can use a global Admin Account, if you add the password in the credential area, there is no chance to see that password again, it’s hidden.
That’s why I just used a global Admin Account
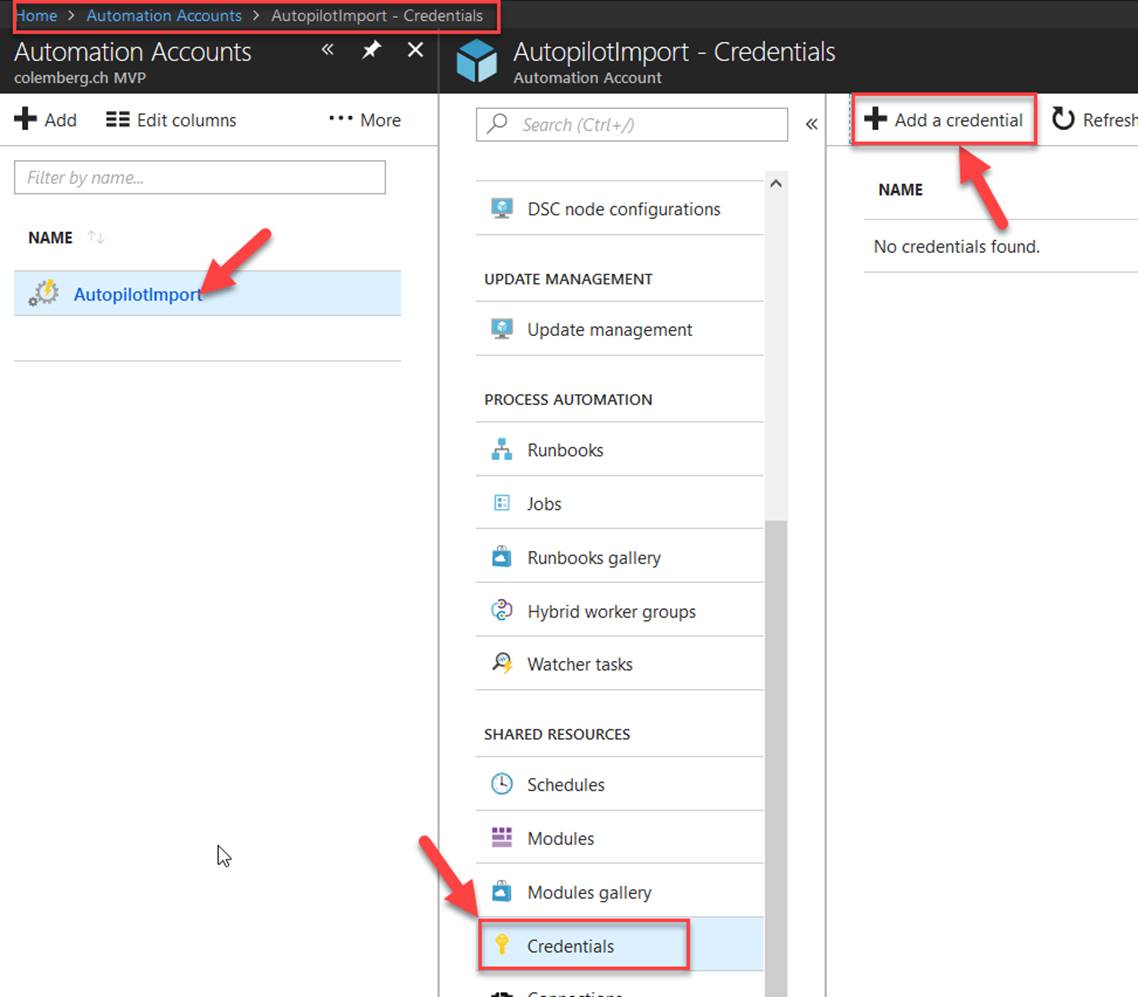
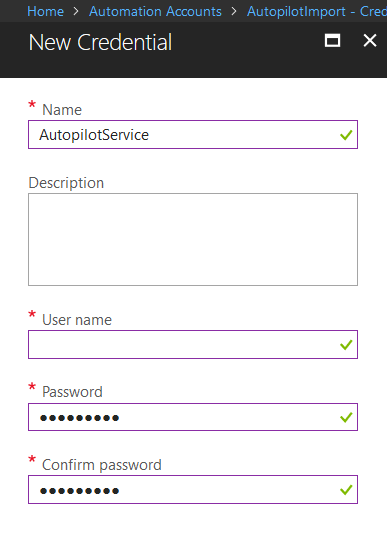
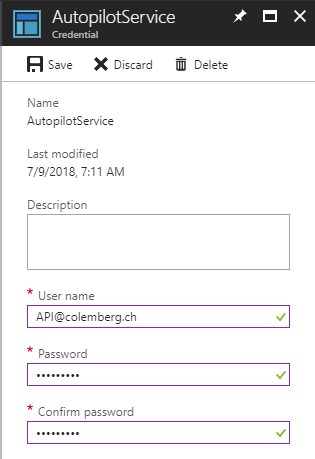
Add this account information to the credentials in the Azure Automation account
If you Like to use a Service account with maximum rights:
First we have to create an Account in AAD to is it only to import the CSV File, the only rights that this “Service” Accounts needs.
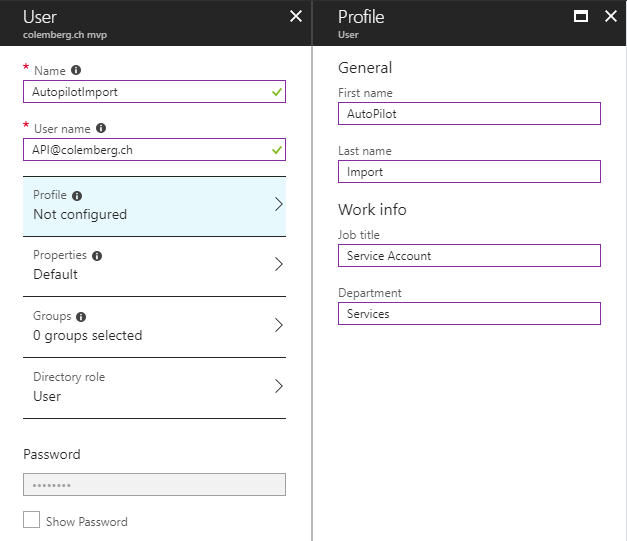
We create this account as a regular User. Do not forget to copy the Password.
Next step is going to Intune Blade and create a Intune Role
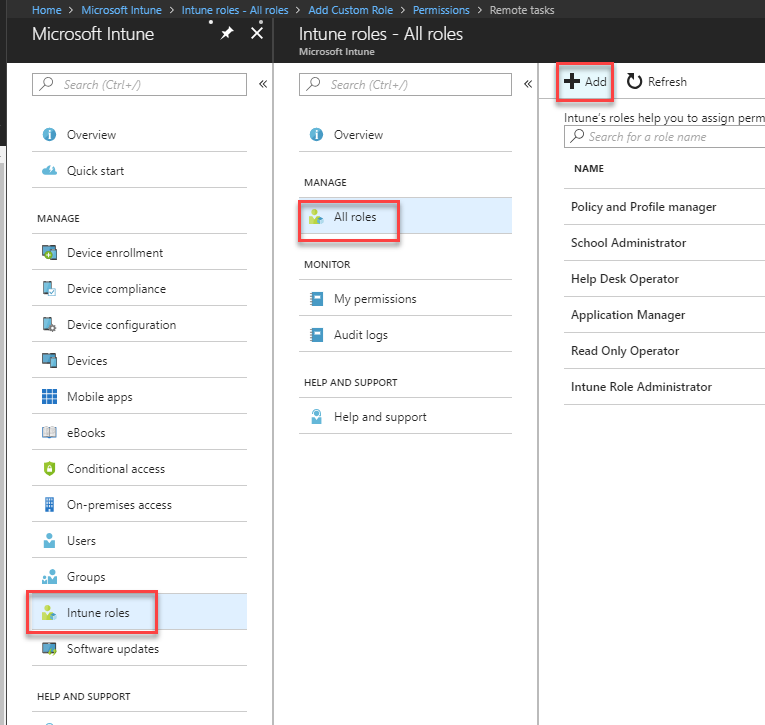
Create a Role with the following rights:
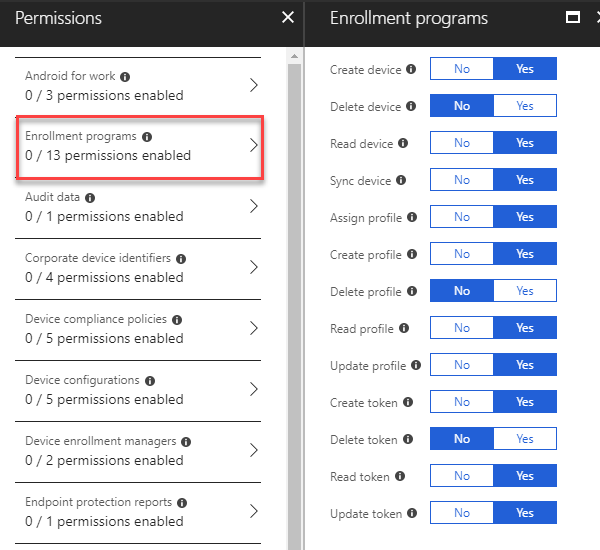
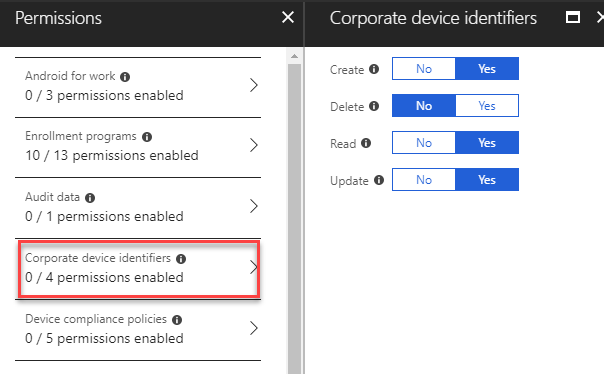
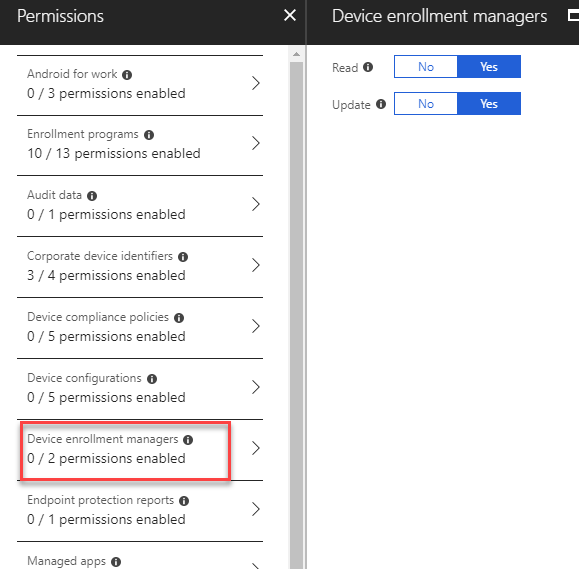
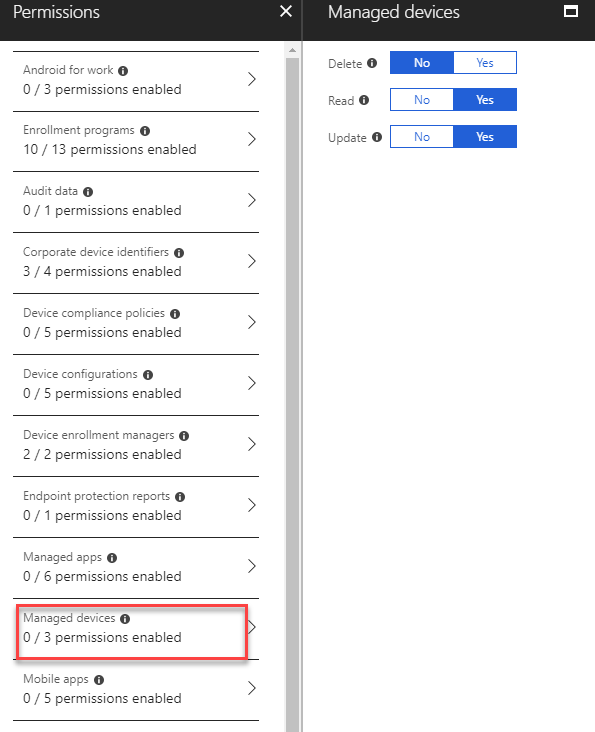
Assign that Role to the Usergroup where our Service User is placed.
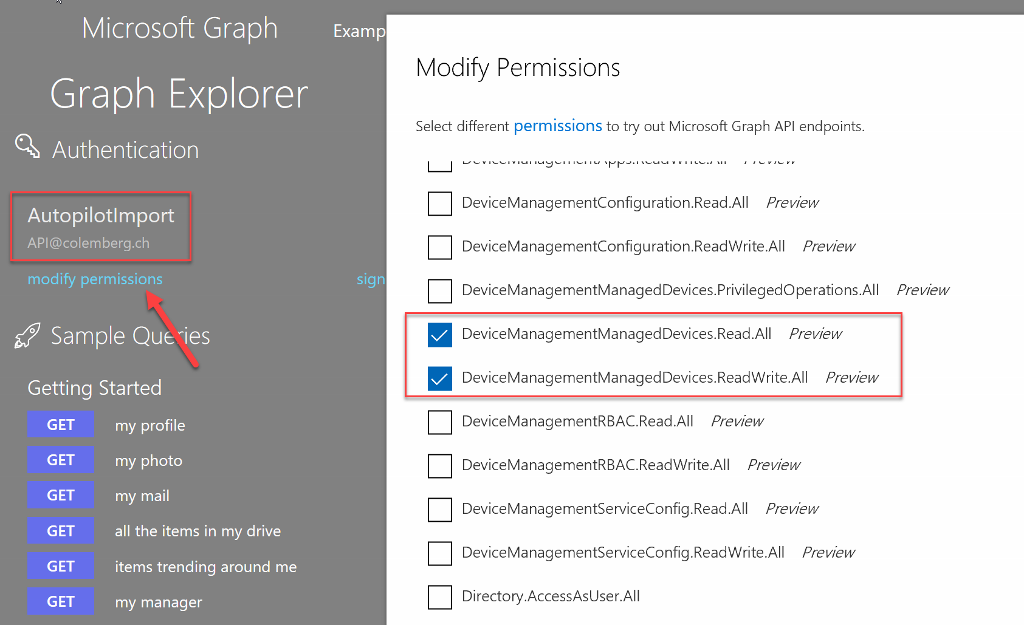
Then we like to login at the Graph Website to check the Permissions.
Add this account information to the Credentials in the Azure Automation Account instead of the Global Admin Account
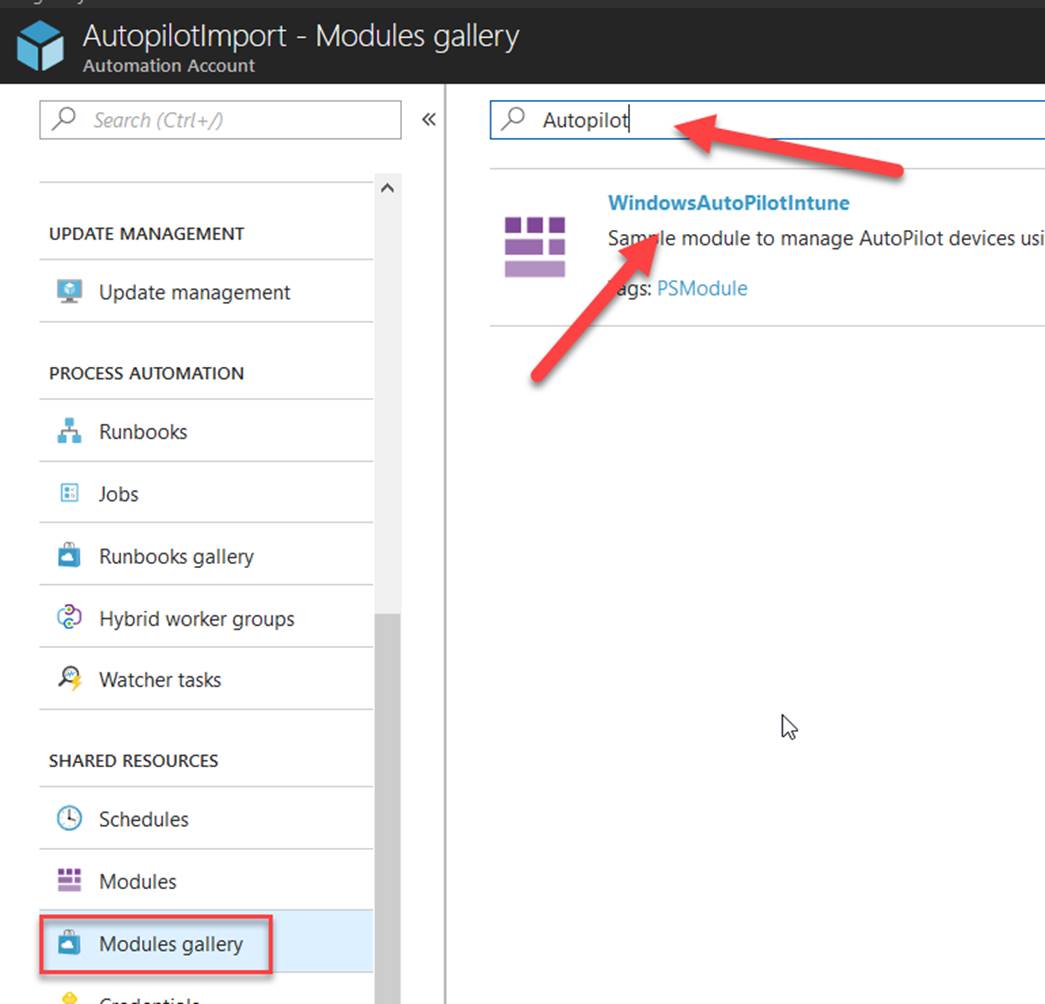
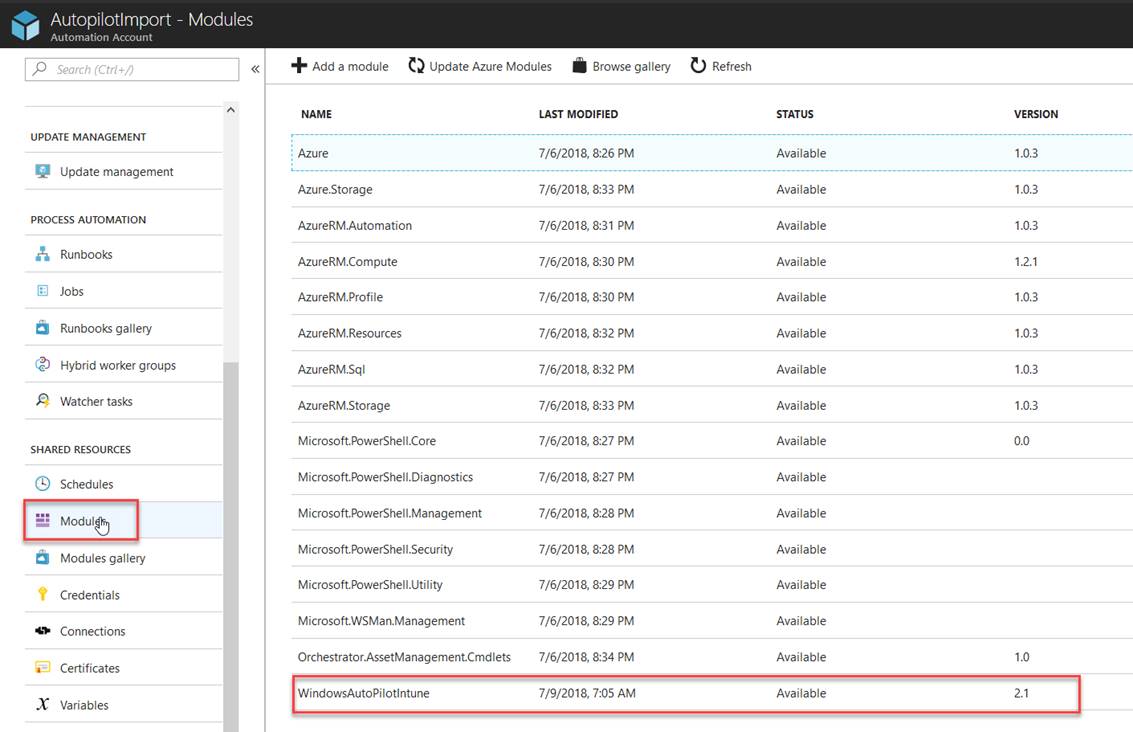
2.3. Adding the PowerShell Modules to the RunBook
Add the Module to your RunBook
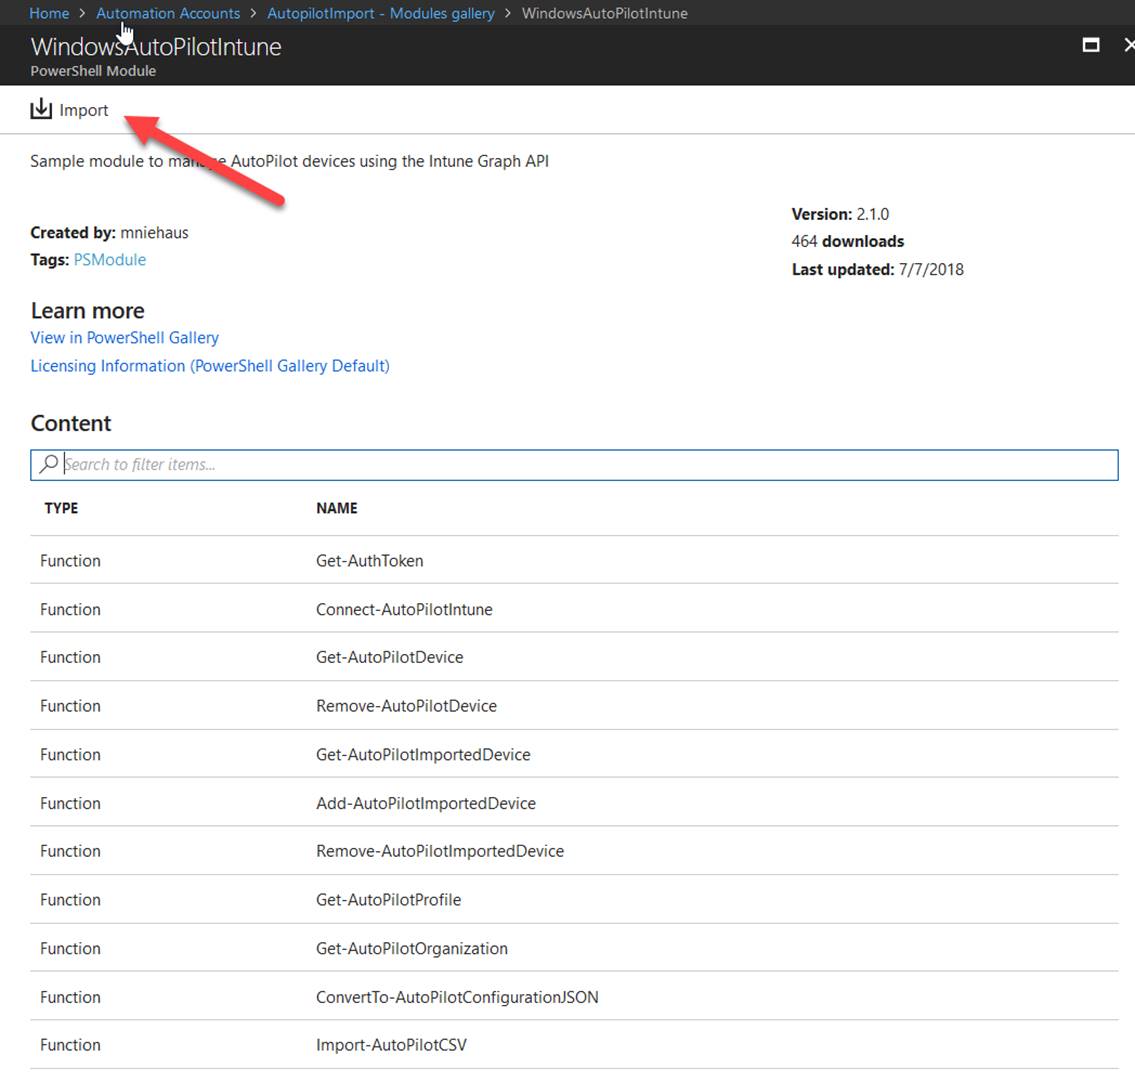
We need all these modules:
-
- WindowsAutoPilotIntune
-
- AzureAD
-
- AzureAD.Storage
-
- Azure
- AzureRM.Storage
In the End you can see the Modules in the Modules Tab, The WindowsAutoplilotIntune should be in version 2.1 (at this time when the Blog was written)
2.4 Import the Script
At the Github repository catch the Script:
https://github.com/slaet/IntuneScripts/blob/master/ImportCSVAutopilot.ps1
(this script is working, and Exported from my Azure Automation Account, just fill in the change Variables, and then Import it to your tenant and try)
Be carefully and change the Variables that are highlighted in the Script that the Runbook is really Working.
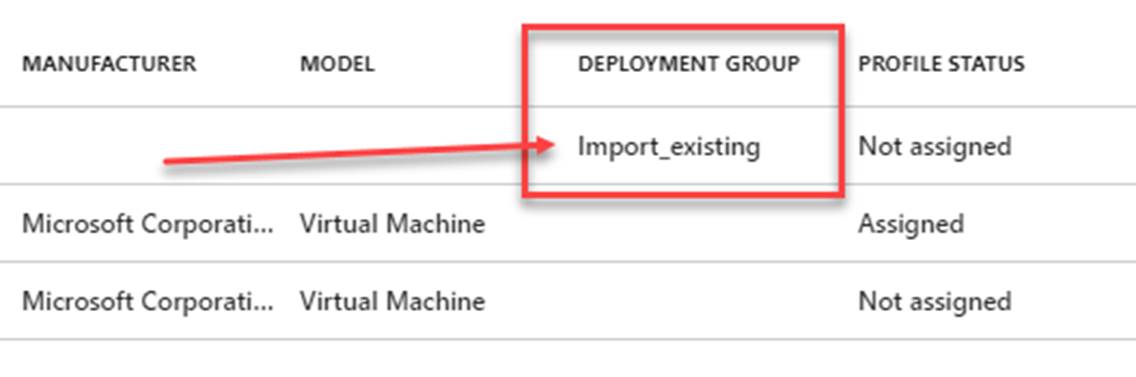
During the Import of a Device we create a Json on the Fly and that means we have a little trick, we can define a field by our self and later on when we create the Dynamic group we can query this property.
The property is called “orderIdentifier”, if you like to change that it’s in the very end of the script:
![Computergenerierter Alternativtext: ES]SON a" "seria1Number": " SSN" , "productKey": " SWPK "orderldenti fi er": "Import_existing" "a](http://blog.colemberg.ch/wp-content/uploads/imported-onenote-images/onenote-5b544f650eb672.04195494.png)
This looks this way in the Intune Windows Enrollment Console:
“Update, we now have the chance to convert the CSV File directly to a JSON file and upload it that way, this is a CMD-Let in the AutopilotInformation Module 2.1 script” this is already integrated in the Script I wrote
-
-
Create an automation process to load the Info’s directly to Intune
-
In this are we like to add the Script for the import of the CSV-files to Intune trough the Graph API
Here is my step by Step:
3.1 Adding a RunBook to the Automation account
3.2 Testing the Runbook
3.3 Configure a Schedule when the Runbook is running
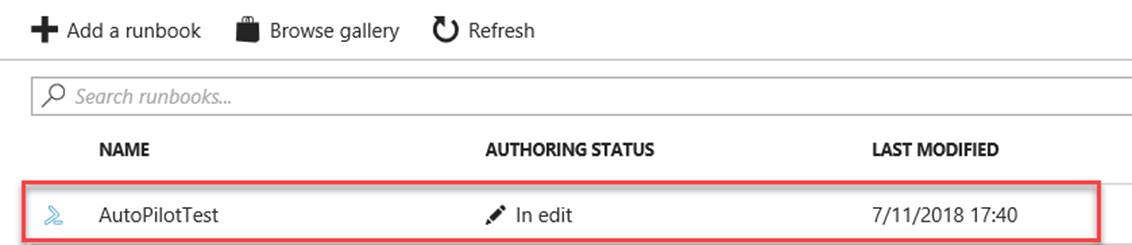
3.1 Adding a RunBook to the Automation account
To create the Runbook it is simple:

Add a runbook and give it a name and select the run book type:
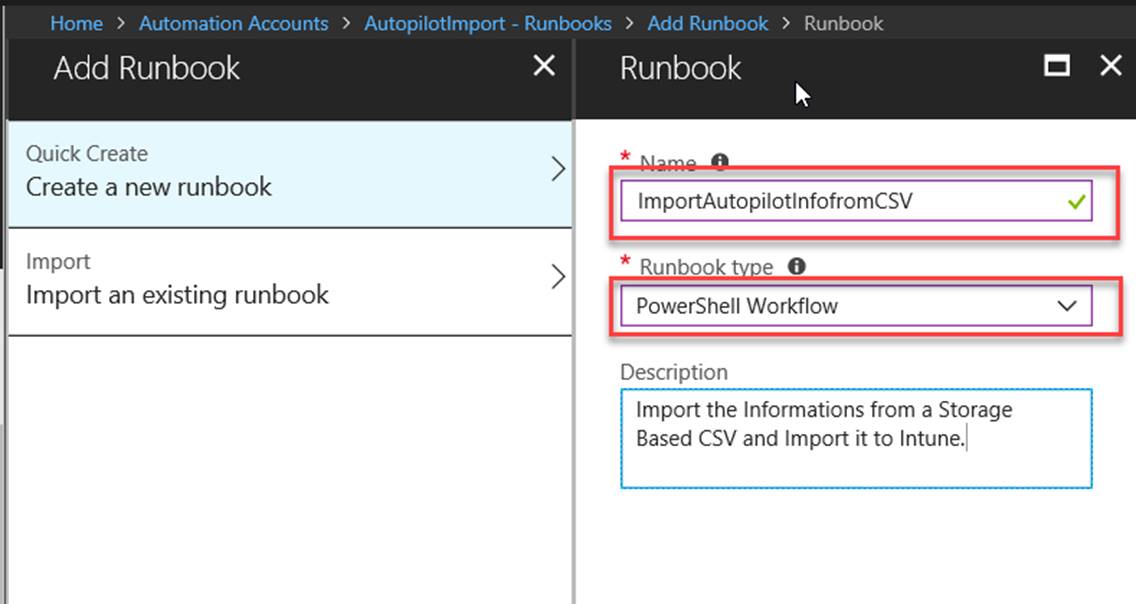
After you select the Create button, it should open the properties of the created run book:
Go ahead and select the Edit
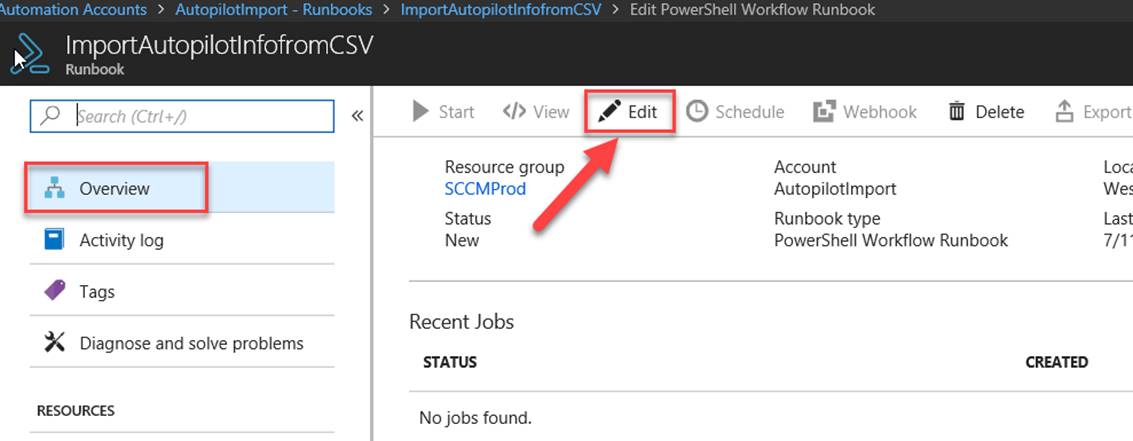
It opens the Edit workflow. (I got a workflow, it is better to troubleshoot, in case you get errors, just add to the script the writ-output and the variable, in the workflow you can see that ;-))
Just C&P the Script from GitHub and save and Publish the Script:
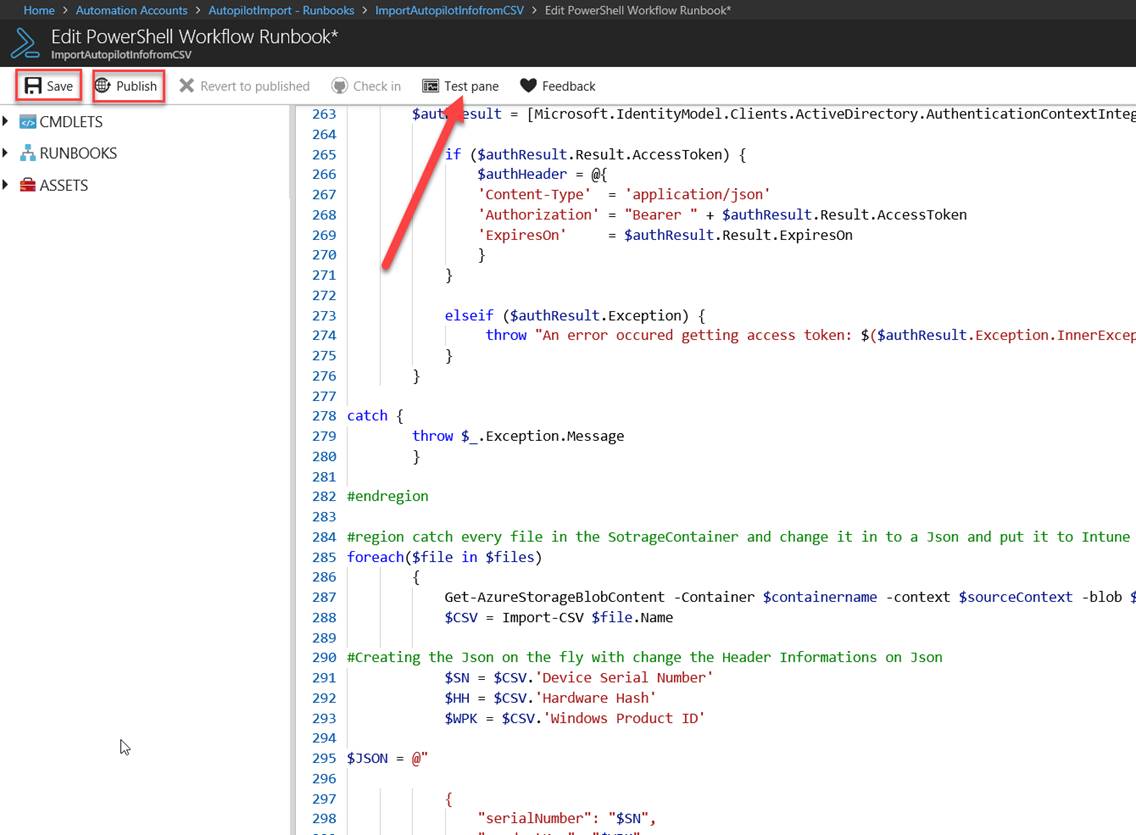
In the end you can use the test pane, to run it and test it.
3.2 Testing the Runbook
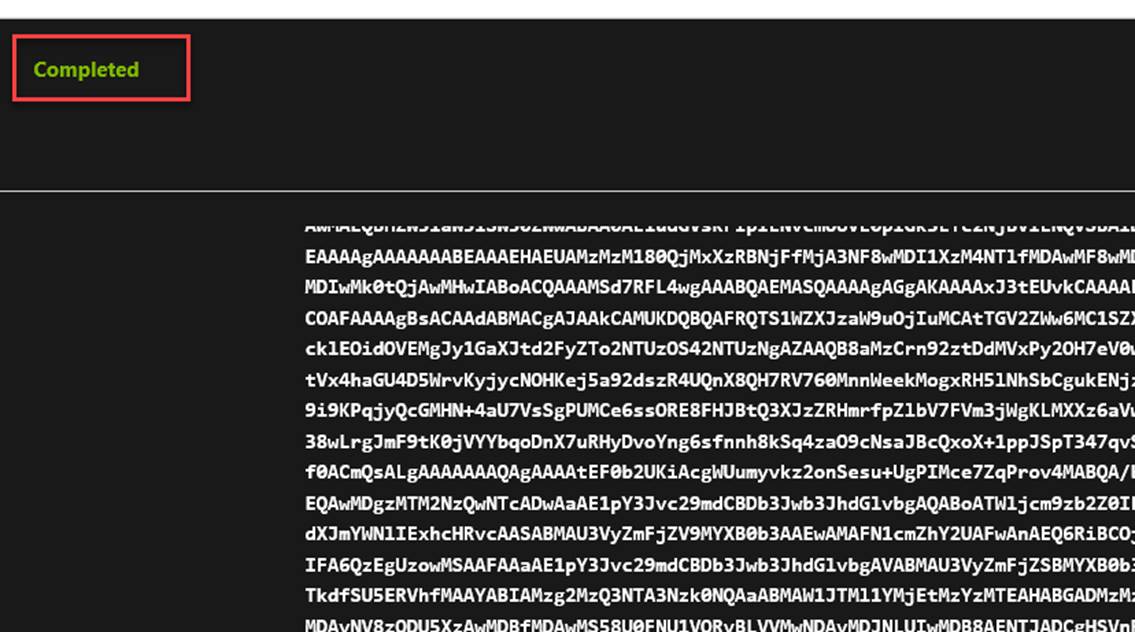
To test the script just press Start in the middle of the Window you can see what is going on:
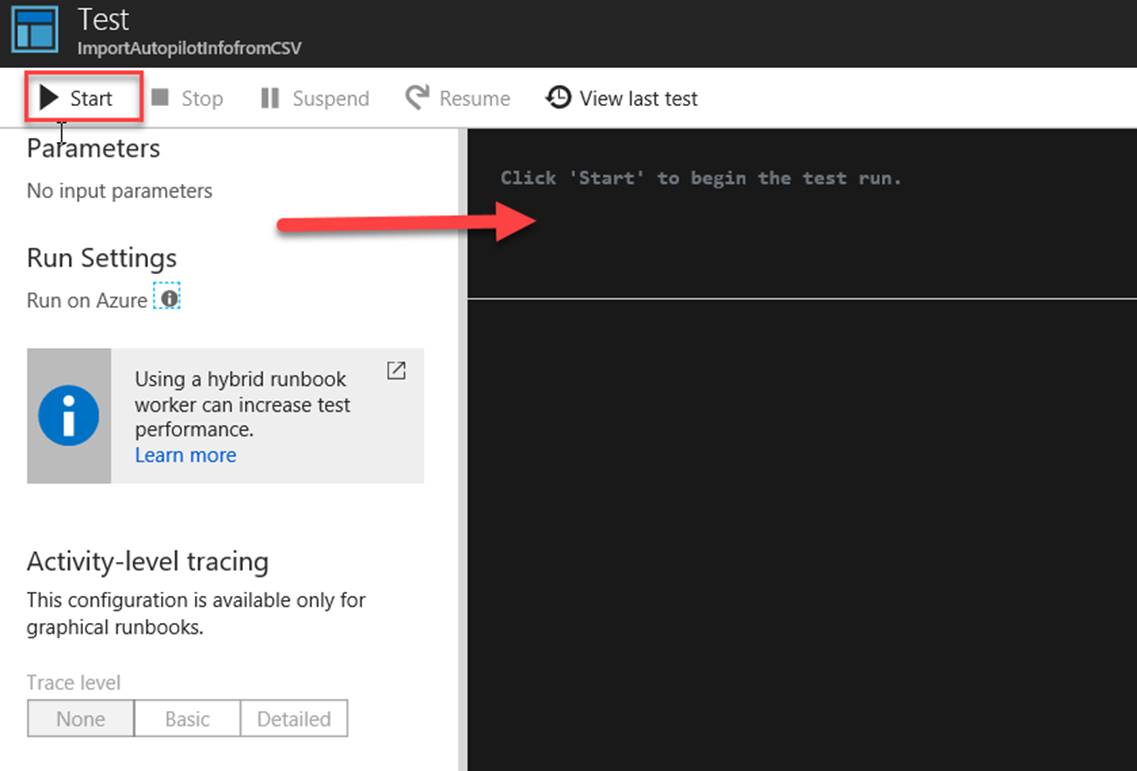
As the End result you should see completed, without any errors
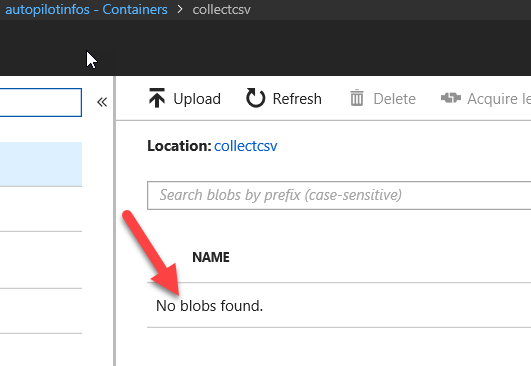
And your Blob should be gone away:
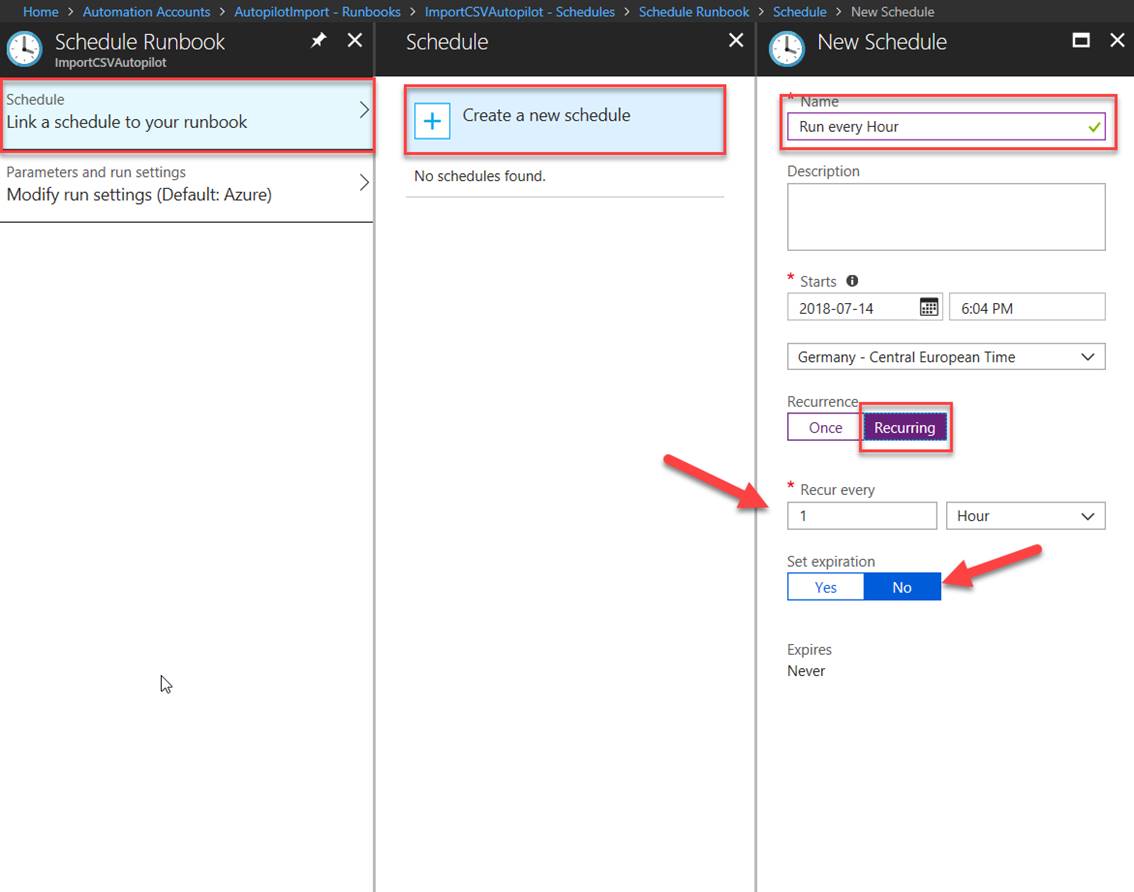
3.3 Configure a Schedule when the Runbook is running
On the Runbook itself you can set a schedule:
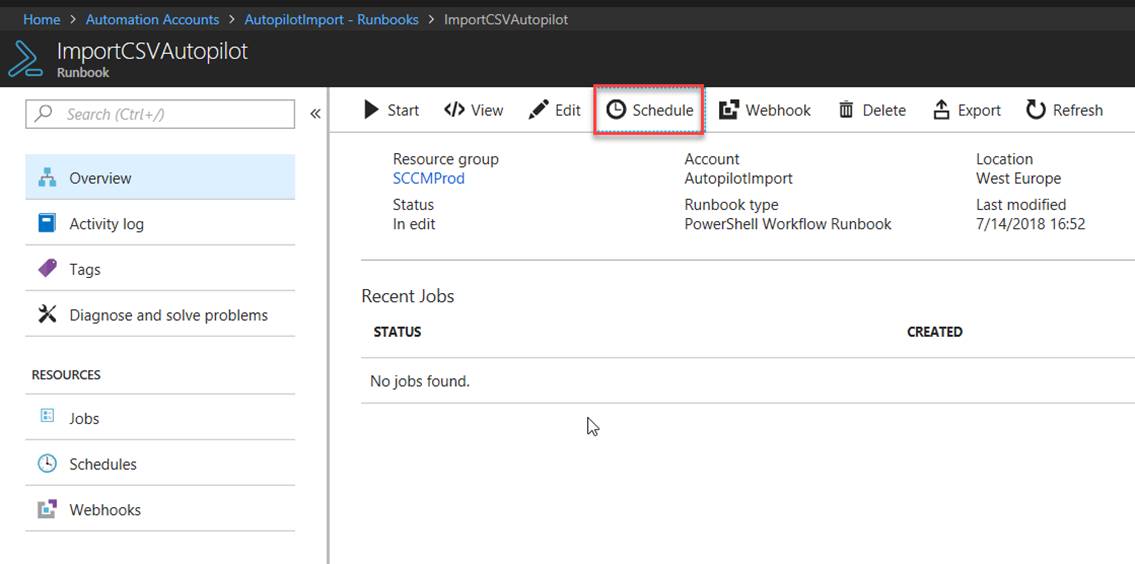
I just run it every hour:
-
-
Automate the assigenment from an Autopilot Profile to a Device Group
-
In this Part we go to Azure AD and create a new group, you can choose the naming for this by your Naming Concept, or feel free to use mine.
This would be a dynamic device group, that we can select the Property we set during the Import of the CSV file. In step 2.4 of this BlogPost.
I go to Azure AD and create a group with a assignment, I like to add the devices by script and use different Groups for different Autopilot profiles.
Here is my step by Step:
4.1 Create Azure AD Group
4.2 Create and Assign an Autopilot Profile
4.1 Create Azure AD Group
Go to your Azure Active Directory and select Groups:
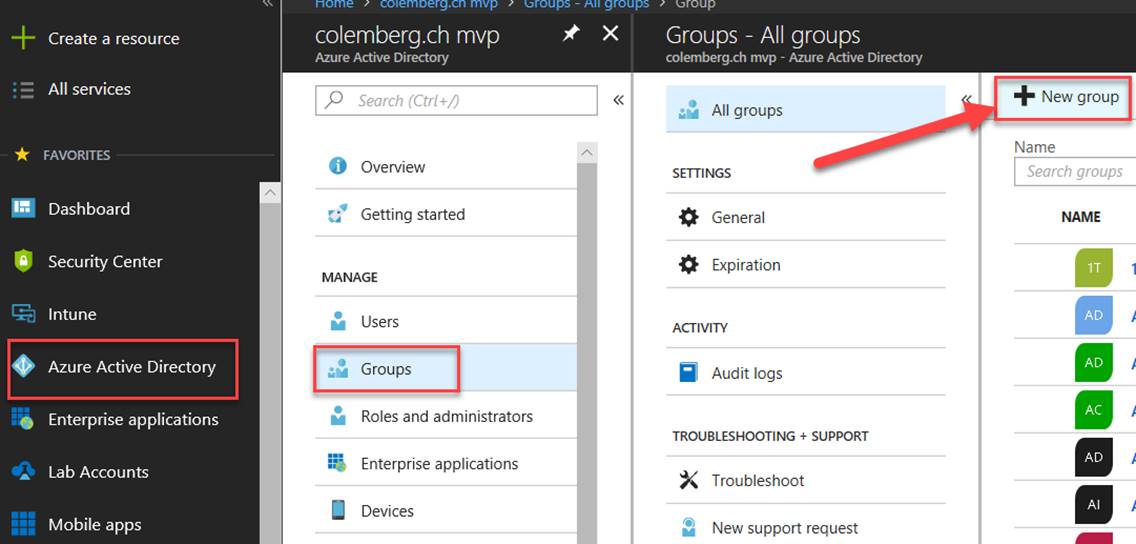
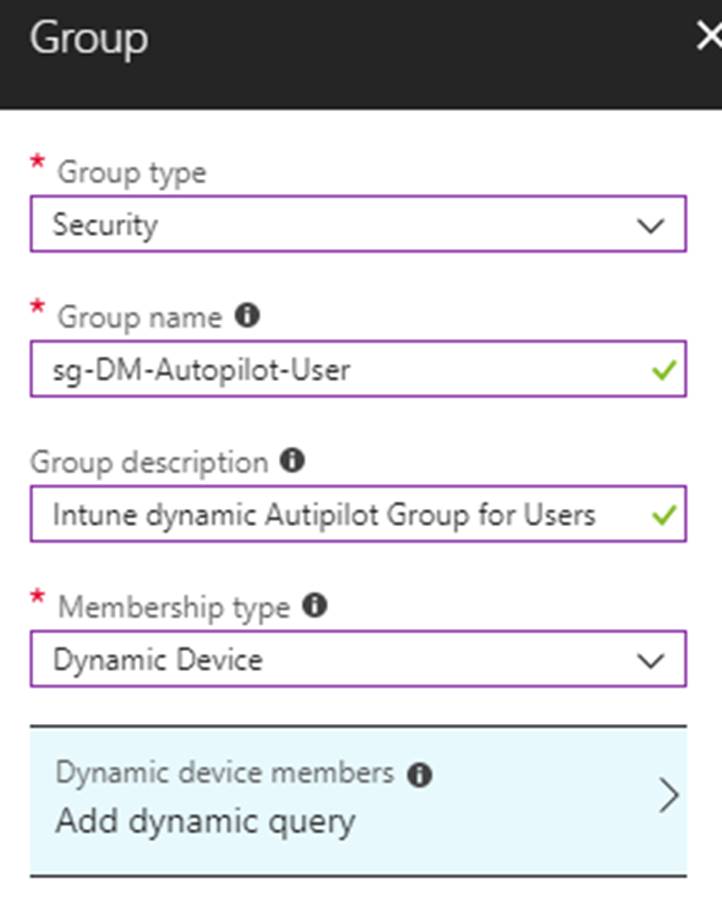
Creating a new Group:
You can see this is not a standard Property, but a sub-property from devicePhysicalIDs, however you need a copy & past Statement:
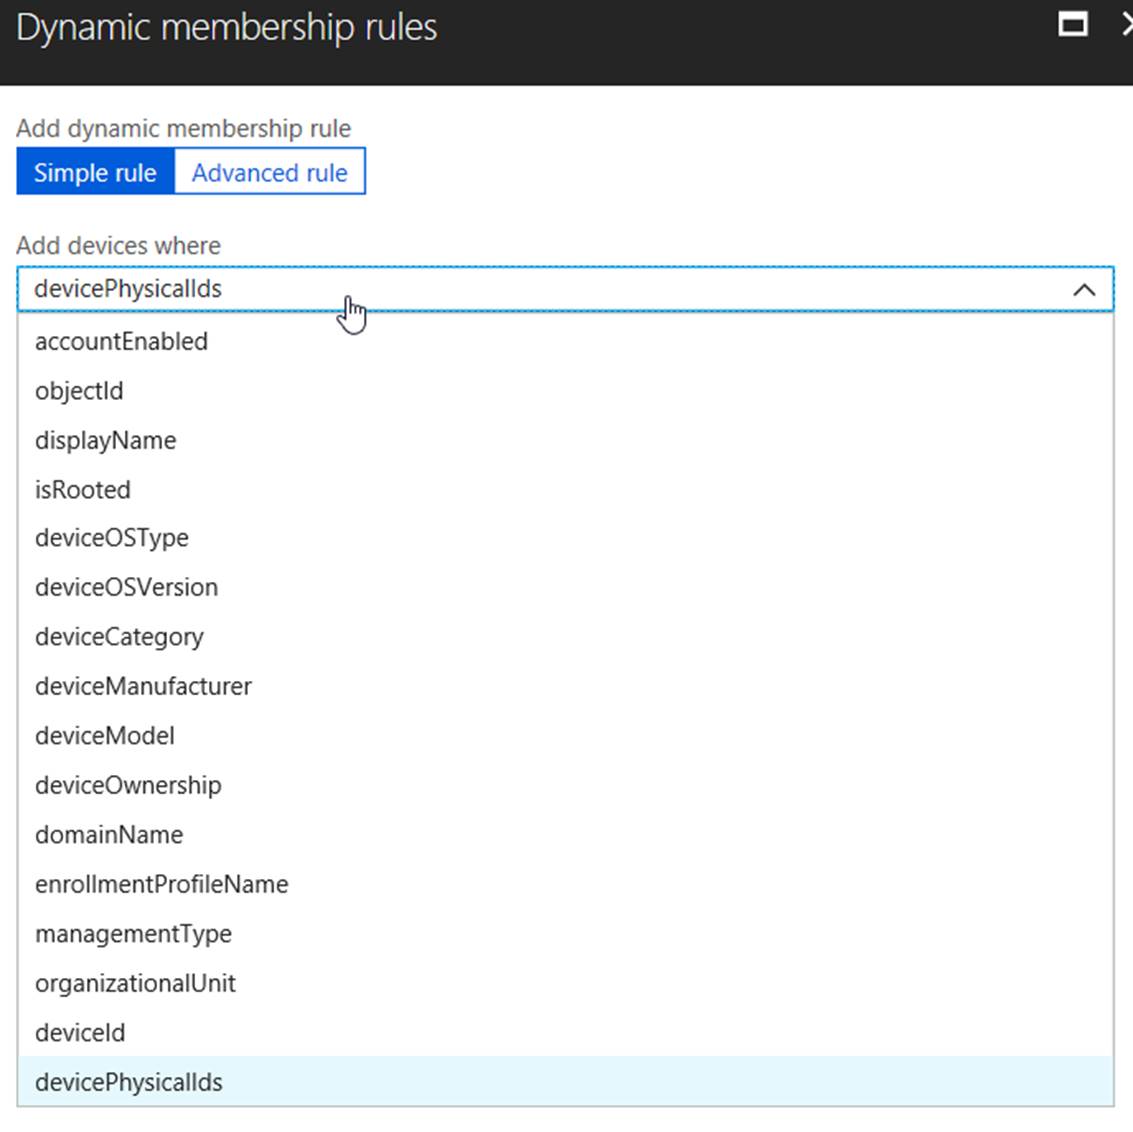
Select Advanced rule:
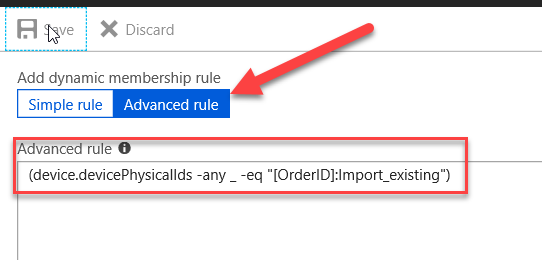
(device.devicePhysicalIds -any _ -eq “[OrderID]:Import_existing”)
The OrderID is the “orderIdentifier” and we added the “Import_existing”
It should be a Security Group, with a name from your naming concept and assign, select NO members.
Here we have an article from M. Niehaus about this: https://blogs.technet.microsoft.com/mniehaus/2018/06/13/autopilot-profile-assignment-using-intune/
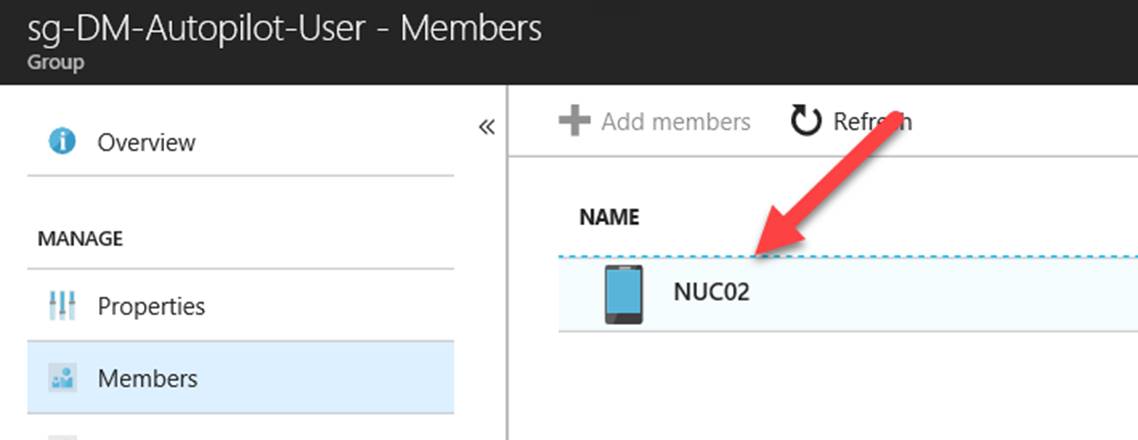
If you created the query right and all works, you should see the new Autopilot added Devices:
4.2 Create and Assign a Autopilot Profile
Go to your Intune Blade and Create an Autopilot Profile and assign that to the Created Group:
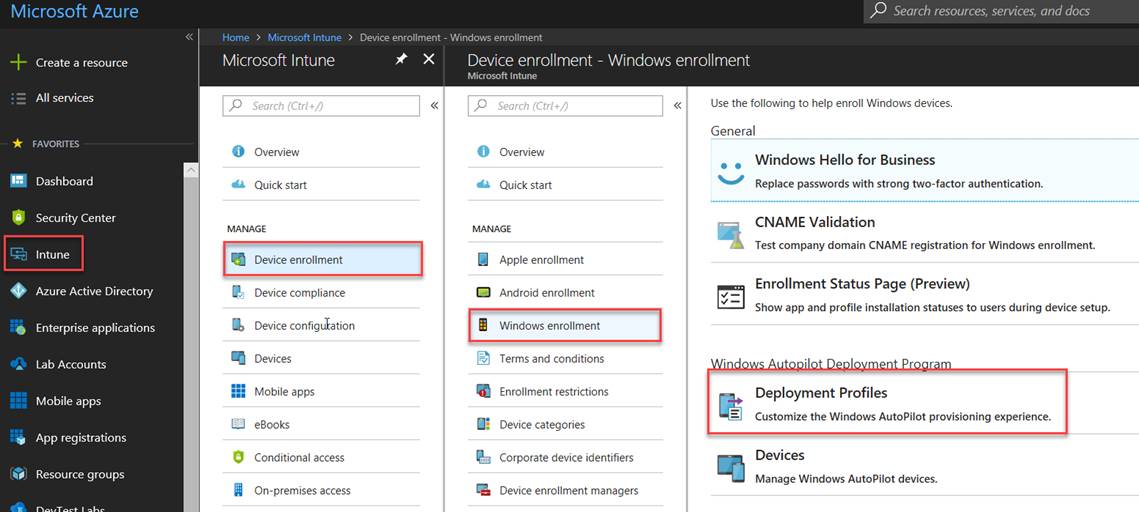
Select the Deployment Profiles and create a new one:
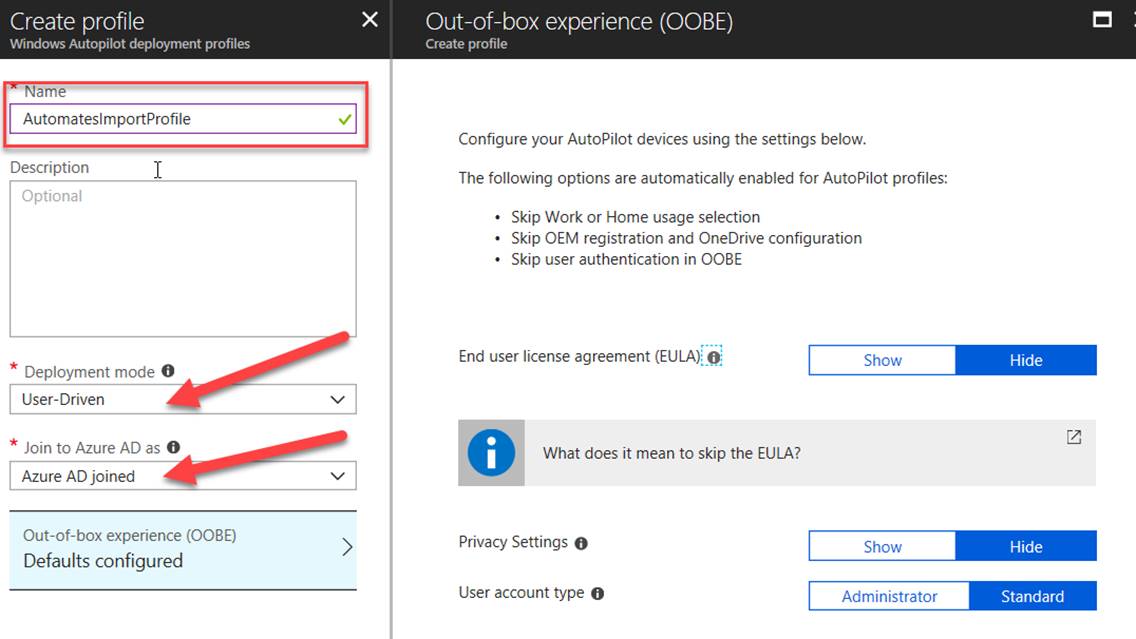
We like to create a User-Driven Profile as we mentioned by creating the Group.
After Creating the Profile we open it and add our created Group to it:
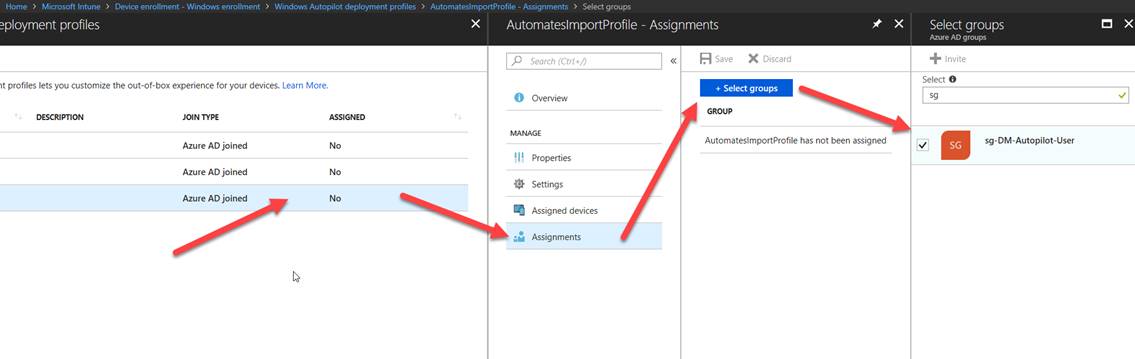
Copy the Name of the Group you are assigned (sg-DM-Autopilot-User) for use in step 4.3 to extend the Script
-
-
Create a Bootable Media to start the automation from an Out of the Box Device
-
Use this Link to create the Bootable Media: https://www.thewindowsclub.com/windows-10-media-creation-tool-create-installation-media-upgrade with the Media Creation Tool
In the end, start this Windows from the Stick and add the PowerShell script to the Autorun:
https://github.com/slaet/IntuneScripts/blob/master/AutoPilotInformation_to_AzureBlob.ps1
Do not forget to set an auto shutdown in the very end of the Script.
And then please set an autologin User:
https://docs.microsoft.com/en-us/windows/configuration/setup-kiosk-digital-signage
Or
https://docs.microsoft.com/en-us/windows-hardware/customize/enterprise/create-a-kiosk-image
How to do this step by step, this will Posted in another Blogpost.
-
Some details and Configs in Intune that help you later on
Note for the Optimization to import the CSV over the Run Book:
You can also create a webhook for this run book, that allows you to add that parameter to the very first script and when the script is finished, in the very end you can add the webhook, that means you can as soon as possible as the CSV File is generated on the Blob Storage Container, run the action to import that file 😉
Overview about Autopilot:
https://www.microsoft.com/en-us/windowsforbusiness/windows-autopilot
Referencing Groups Properties in group Queries:
https://blogs.technet.microsoft.com/mniehaus/2018/06/13/autopilot-profile-assignment-using-intune/
Inspiration for the Blob (Thank you Peter):
Details from the Intune PoSh sample repo:
and
https://developer.microsoft.com/en-us/graph/graph-explore
and
PoSh Module from Niehaus:
https://www.powershellgallery.com/packages/WindowsAutoPilotIntune/2.1
Ideas for the Storage creation:
http://www.itprotoday.com/microsoft-azure/copy-content-one-azure-storage-account-another
Test it before use it, this Post “is as is”
Hope it helps and saves you some time to have a Beer….
(Some Thx to Dave Falkus and Athi Kugaseelan)
Leave a Reply